
American Flag Layered Cake
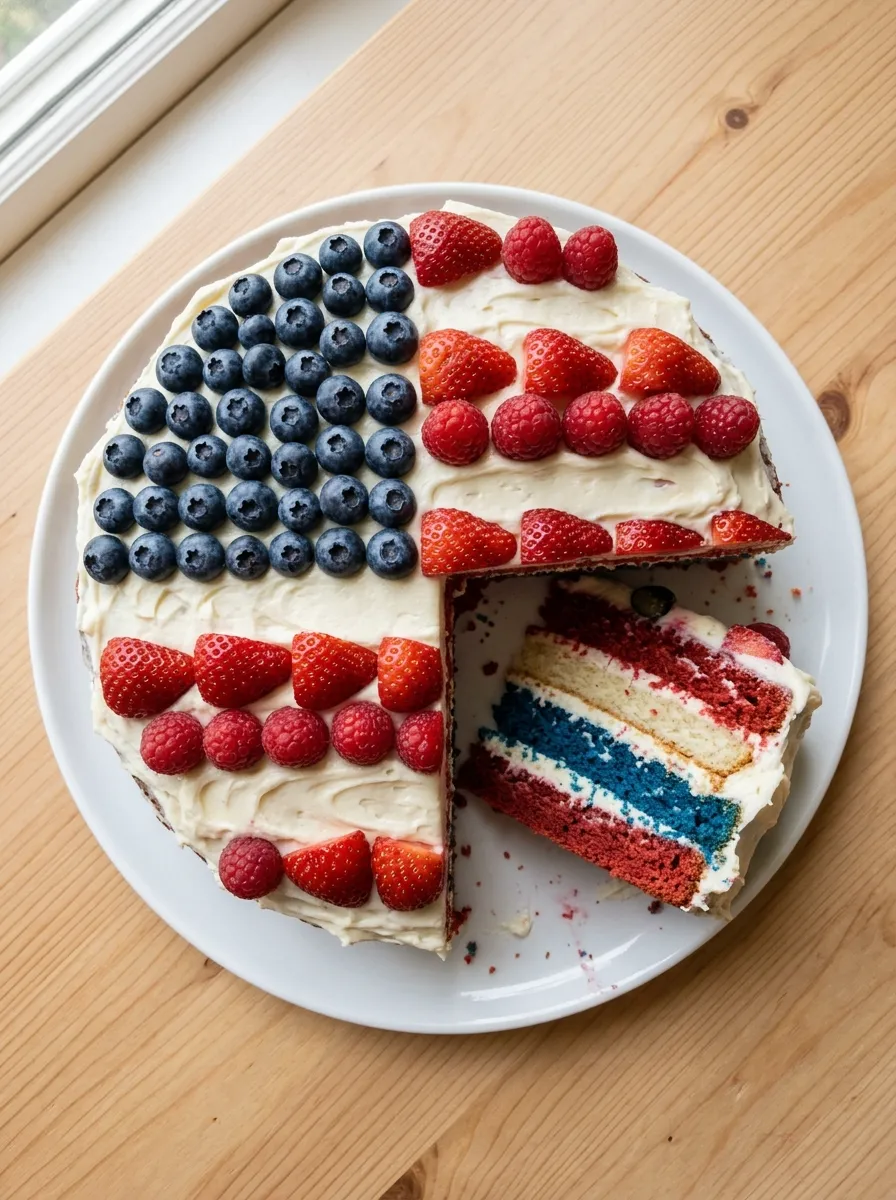
This American Flag Layered Cake is a spectacular patriotic dessert made with soft cake layers, creamy frosting, and vibrant red, white, and blue decorations. With its bold colors and impressive presentation, it is perfect for Memorial Day, Independence Day, Labor Day, summer parties, and other patriotic celebrations.
The beauty of this American Flag Layered Cake is that it looks elaborate while relying on straightforward decorating techniques. Tender cake, smooth white frosting, and colorful layers come together to create a dessert that is both festive and delicious.
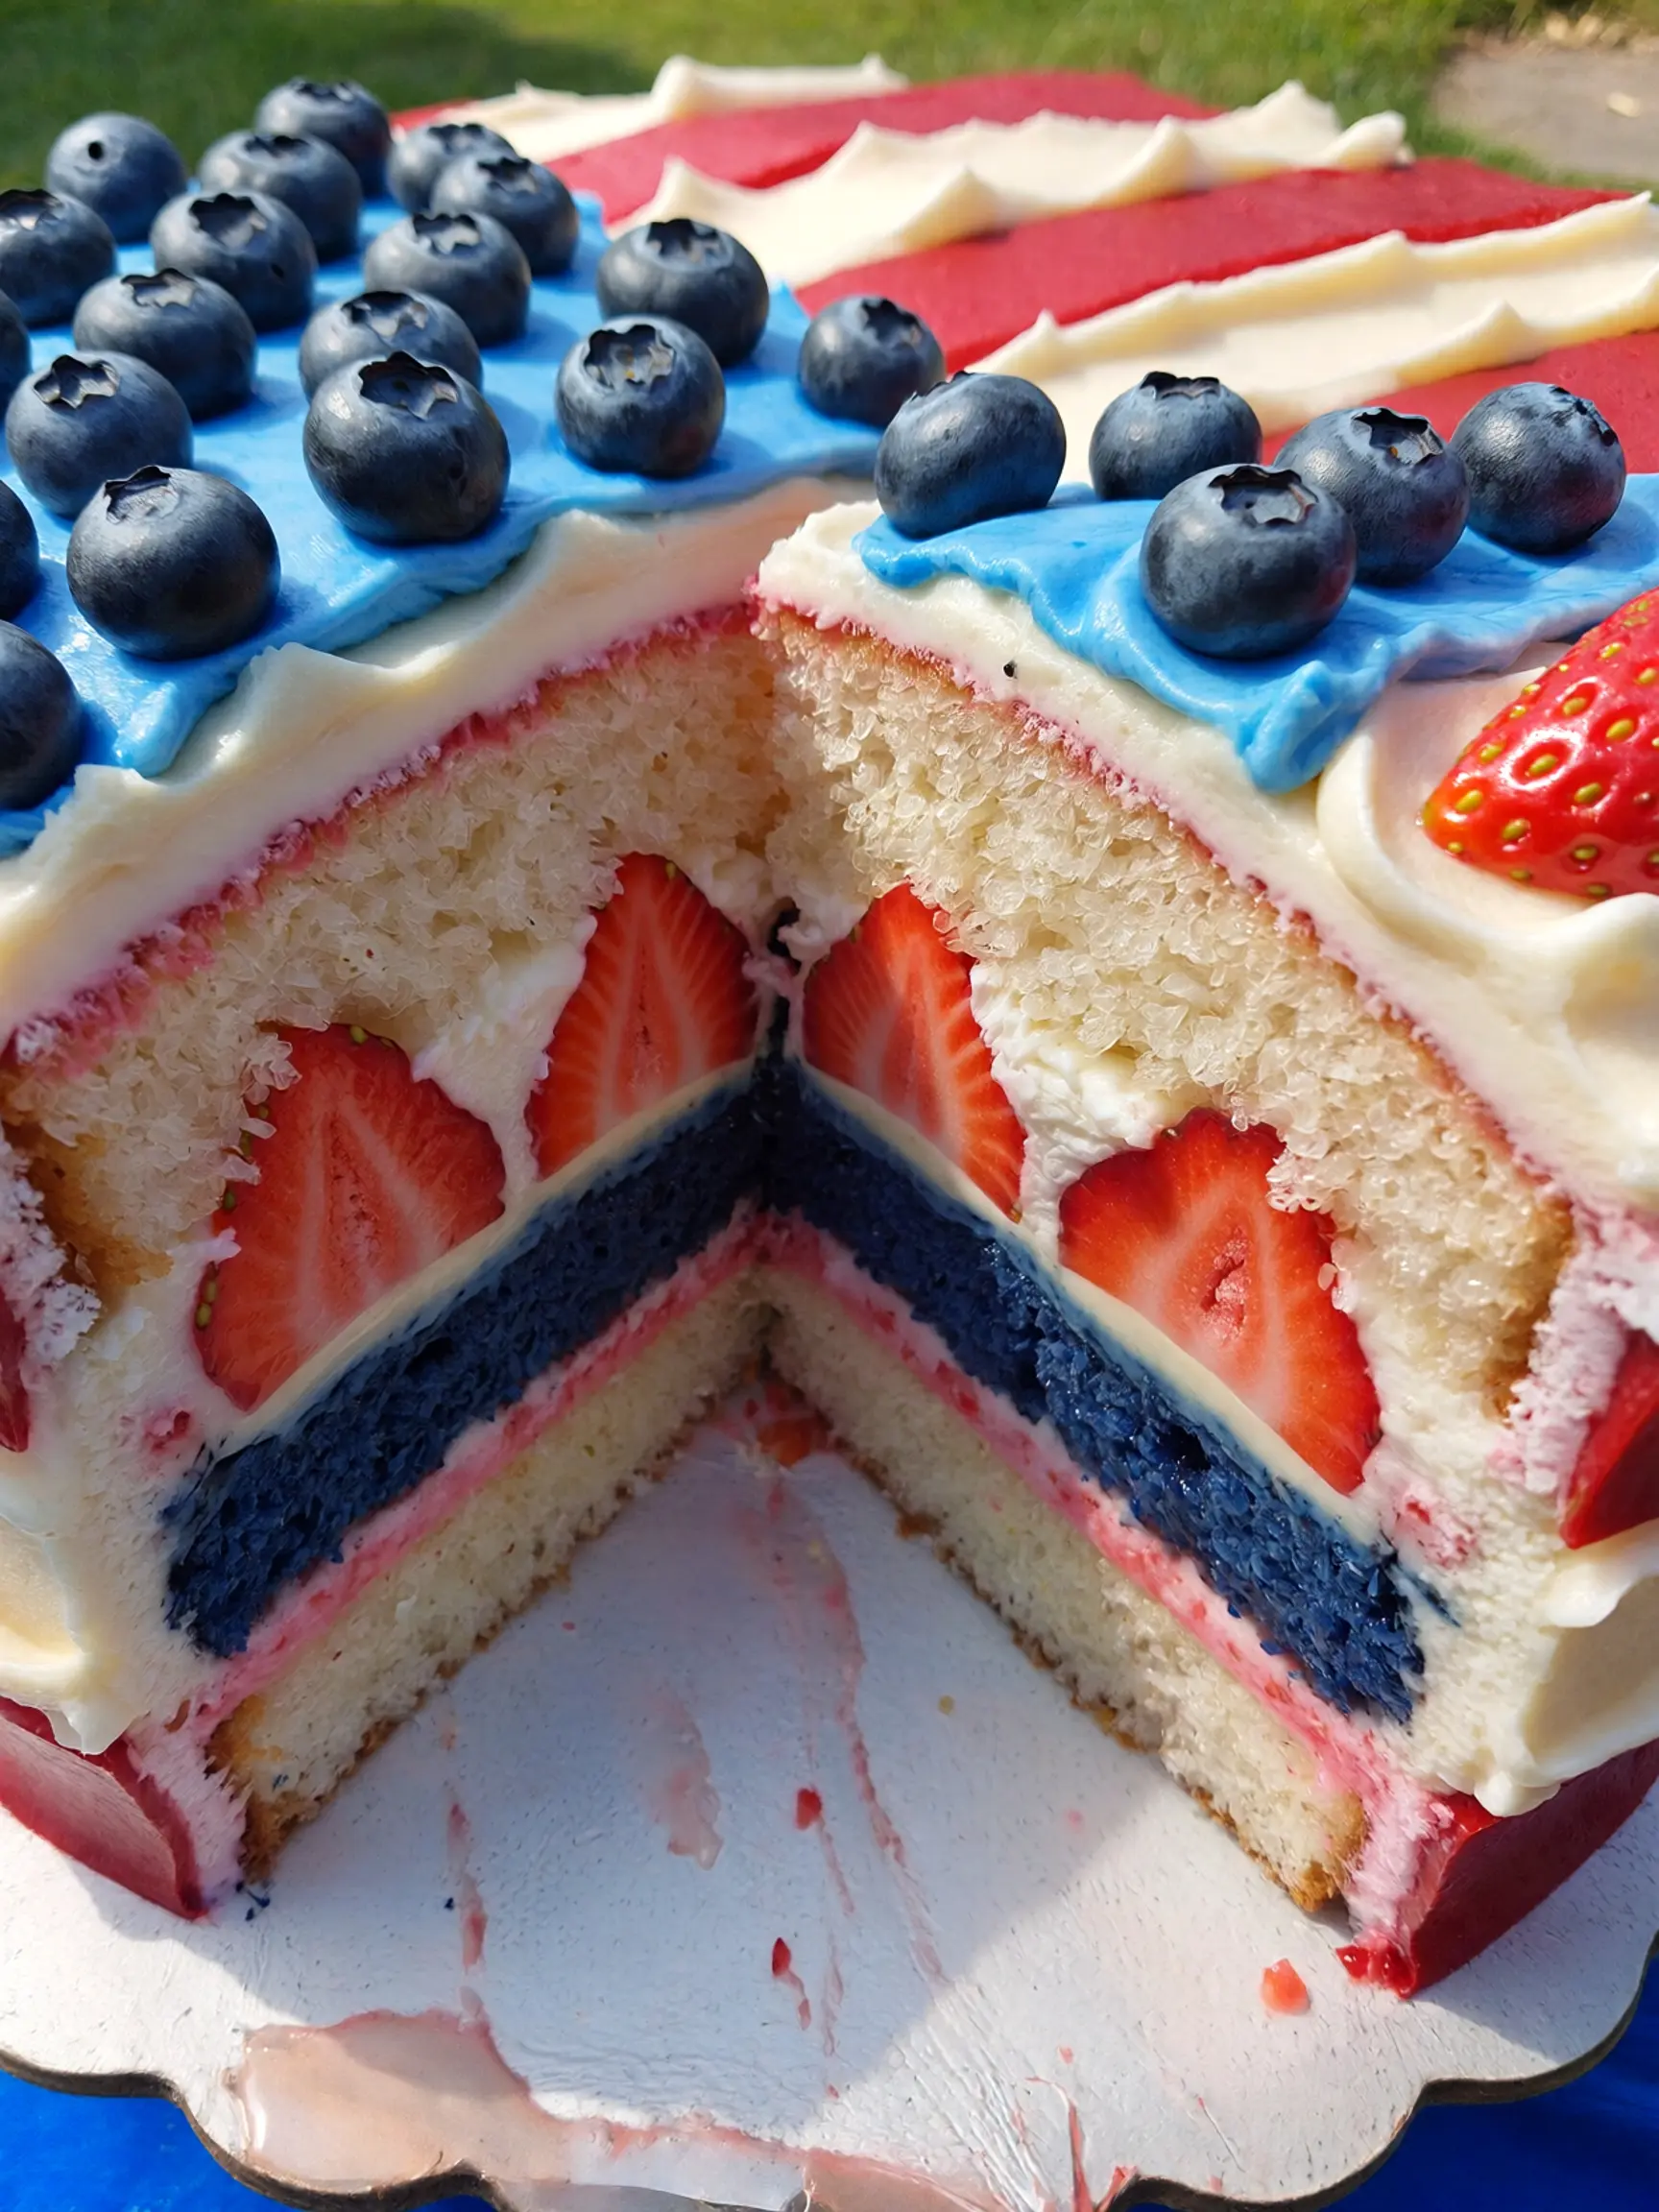
Whether you are hosting a backyard barbecue, bringing dessert to a Fourth of July gathering, or simply looking for a memorable summer baking project, this American Flag Layered Cake makes an eye-catching centerpiece. Slice into the cake to reveal the colorful layers inside, then serve chilled or at room temperature for a celebration-worthy dessert.
Table of Contents
Essential Ingredients and Sensory Substitutions
The secret to a successful flag cake is a sturdy Vanilla Buttermilk Sponge. You will need 3 ½ cups of cake flour (which provides a tighter crumb than all-purpose), 2 cups of granulated sugar, 1 ½ cups of unsalted butter at room temperature, and 4 large eggs. For the leavening and moisture, gather 1 cup of full-fat buttermilk and 1 tablespoon of pure vanilla bean paste for those visible, gourmet flecks.
To achieve the iconic hues, you must use Professional Grade Gel Food Coloring (Royal Blue and Super Red). Liquid colors will alter the pH of the batter and result in a “muddy” or faded look. For the “glue” that holds the layers together, prepare a Crusting Vanilla Buttercream using 2 lbs of powdered sugar, 2 cups of butter, and 1/4 cup of heavy cream.
For those looking to personalize the flavor profile, consider these substitutions. If you prefer a natural colorant approach, use beet powder for the red layers and butterfly pea flower powder for the blue; while the colors will be more “muted” and “earthy,” the flavor remains sophisticated.
For a lighter texture, you can substitute the buttercream with a stabilized whipped cream (using gelatin or mascarpone), though this reduces the cake’s “counter life.” If you need a dairy-free version, almond milk with a tablespoon of lemon juice acts as an excellent buttermilk replacement, and high-quality vegan butter sticks provide the necessary saturated fat for the crumb structure. To add a modern twist, fold miniature white chocolate chips into the blue layer to represent the “stars” without extra carving.
Precision Timing for Structural Success
This cake is a multi-stage project that rewards the patient baker. The total active prep time is 60 minutes, with a baking time of 30-35 minutes per batch. However, the structural cooling phase is the most critical, requiring at least 2 hours in the freezer for the individual layers before carving. Data from high-end bakeries shows that chilled cake has 40% less “crumb shed,” allowing for the clean, sharp lines necessary for the flag’s interior. Total time from start to finish is roughly 5 hours, which is 15% more time than a standard cake but results in a significantly higher success rate for the internal reveal.
Step 1: The Three-Tone Batter Preparation
Divide your prepared vanilla buttermilk batter into three bowls. Leave one bowl white (the largest portion), tint the second bowl deep red, and the third bowl navy blue. Bake these in 8-inch round pans. You will need two red layers, two white layers, and one thick blue layer. Pro-tip: Use bake-even strips around your pans to ensure the cakes rise flat; a domed cake requires more leveling, which wastes the precise amount of colored sponge needed for the internal stripes.
Step 2: The “Stripe” Calibration
Once the cakes are baked and completely chilled (preferably frozen for 30 minutes), level the tops. Take one red layer and one white layer and slice them horizontally in half to create four thin discs. These will form the “bottom stripes” of your flag. Stack them alternating: Red, White, Red, White, with a thin, even layer of buttercream between each. This bottom stack should reach exactly half the height of your intended cake.
Step 3: The “Canton” Carving
This is the “generative” part of the process. Take your remaining red and white layers and cut a 4-inch circle out of the center of each using a round cutter. Do the same with the blue layer, but keep the outer ring of the blue cake and the inner circles of the red and white ones. Place the blue ring on top of your stripe stack. Inside the blue “donut,” continue the alternating stripe pattern using the smaller red and white circles. This creates the blue field on the outside and the stripes that continue through the center.
Step 4: The Crumb Coat and Final Polish
Apply a “crumb coat”—a very thin layer of frosting—over the entire cake to lock in the colored crumbs. This is essential because red and blue crumbs can easily “bleed” into your pristine white exterior frosting. Refrigerate for 30 minutes until the coat is firm. Finally, apply a thick layer of white buttercream. For a professional finish, use a bench scraper to create a smooth surface, or use a star tip to pipe a “rosette” pattern that mimics the texture of a fabric flag.
Comprehensive Nutritional Information
A single slice of this decadent celebratory cake (1/12th of the cake) contains approximately 540 calories. The breakdown includes 26g of fat, 72g of carbohydrates, and 5g of protein. While it is a high-energy treat, the use of buttermilk provides a small amount of calcium and potassium. To manage caloric intake, data suggests that the “reveal” is the main event; serving thinner slices (1/16th) allows guests to enjoy the visual artistry with a more moderate 400-calorie portion.
Healthier Alternatives for the Recipe
To create a lighter American Flag Layered Cake, replace some of the traditional buttercream with a Greek yogurt and honey frosting. This creates a creamy topping with a slightly tangy flavor that pairs beautifully with the sweet cake. You can also replace part of the cake flour with oat flour for added fiber and a subtle nutty flavor.
For a naturally colored red, white, and blue cake, consider using freeze-dried raspberry powder for the red layers and natural blueberry-based coloring for the blue. These options can add extra fruit flavor while reducing reliance on artificial food dyes.
Creative Serving Suggestions
For the best presentation, make the reveal part of the experience. Bring the chilled American Flag Layered Cake to the table before slicing, then use a long, thin serrated knife to create clean cuts. Wipe the knife between slices to keep the red, white, and blue layers sharp and distinct.
Serve each slice with fresh blueberries, raspberries, and strawberries to reinforce the patriotic theme. A simple dusting of powdered sugar or a few white chocolate curls can also add an elegant finishing touch without overwhelming the patriotic layer cake design.
Common Mistakes to Avoid
The most common mistake is assembling the cake while the layers are still warm or soft. Chilled or slightly frozen layers are much easier to stack and help prevent the internal colors from becoming compressed or uneven.
Avoid using excessive frosting between the colored layers. A thin, even layer provides enough support while keeping the proportions of the American Flag Layered Cake visually balanced. Too much frosting can make the hidden flag design appear distorted.
Finally, make sure the blue layer is sufficiently deep in color. A rich royal blue or navy shade creates a stronger contrast with the red and white sections and gives the finished red white and blue cake a more authentic patriotic appearance.
Storing Tips for Freshness
Because of the high moisture content of the buttermilk and the density of the gel colors, this cake stays moist for a long time. Store it in a cake carrier or under a large glass dome in the refrigerator for up to 5 days. If you have already sliced it, press a piece of plastic wrap directly against the exposed “flag” interior to prevent the air from drying out the sponge. This cake also freezes exceptionally well; you can bake and assemble the layers weeks in advance, freeze the whole cake (unfrosted), and then apply the final white buttercream the day before your event.
Conclusion
The American Flag Layered Cake is the ultimate intersection of baking and building, combining classic flavors with a creative hidden design. It challenges the baker to think in three dimensions while delivering a nostalgic dessert that looks as impressive as it tastes.
With its vibrant red, white, and blue layers, this American Flag Layered Cake is perfect for patriotic holidays, summer celebrations, and festive gatherings. While the process requires precision and a little kitchen engineering, the reward is a spectacular patriotic layer cake that creates an unforgettable reveal with every slice.
Whether you are celebrating Independence Day, hosting a summer party, or practicing your hidden cake design skills, this red white and blue cake is sure to be a showstopper. Share your American Flag Layered Cake reveal and inspire other bakers to turn a simple layered cake into something extraordinary.
Frequently Asked Questions
Why did my colors bleed into the white frosting?
This usually happens when the cake is too warm or the layers have not been properly chilled. Always allow the cake layers to cool completely before decorating and apply a thin crumb coat to seal in loose crumbs and colored cake. Chilling the American Flag Layered Cake before the final frosting layer helps keep the red, white, and blue colors clean and distinct.
Can I use a different flavor for the colored layers?
Yes. The red layer can be flavored like red velvet, while the blue layer can have a blueberry or vanilla flavor. Keep the batters similar in consistency so the layers bake evenly and maintain a consistent texture.
How can I get perfectly white frosting?
Use clear vanilla extract instead of traditional vanilla extract and choose a buttercream made with pale butter. If necessary, a tiny amount of violet food coloring can help neutralize yellow undertones and create a brighter white finish.
Can I make this as a sheet cake?
Yes, although the hidden layered design is best suited to a round or rectangular layer cake. A sheet cake can still be decorated with a beautiful American flag design using red, white, and blue frosting, berries, or sprinkles.
How far ahead can I make the cake layers?
The cake layers can be baked ahead of time, cooled completely, wrapped tightly, and refrigerated for a few days. You can also freeze them for longer storage. Thaw the layers before assembling and decorating the American Flag Layered Cake.
How do I keep the cake layers from sliding?
Make sure every layer is completely cool before assembly and use a thin, even layer of frosting between them. Avoid adding too much filling, which can cause the layers to shift. A brief chill after stacking also helps stabilize the cake before final decorating.
Can I use gel food coloring instead of liquid coloring?
Yes. Gel food coloring is often the better choice because it provides strong red and blue colors without adding much extra liquid to the batter or frosting. Add the coloring gradually until you achieve the desired patriotic shades.
Why is my red frosting pink instead of red?
Some red food colorings need time to deepen. Mix the frosting thoroughly and let it rest for a few hours before adding more coloring. Using a concentrated gel coloring designed for deep shades can also help produce a stronger red without making the frosting overly soft.
Can I make the cake without artificial food coloring?
Yes. Natural coloring options include beet powder or concentrated beet puree for red and butterfly pea powder or natural blue food coloring for blue. Keep in mind that natural colors are generally softer and may produce less intense shades than conventional gel coloring.
What decorations work best on an American Flag Layered Cake?
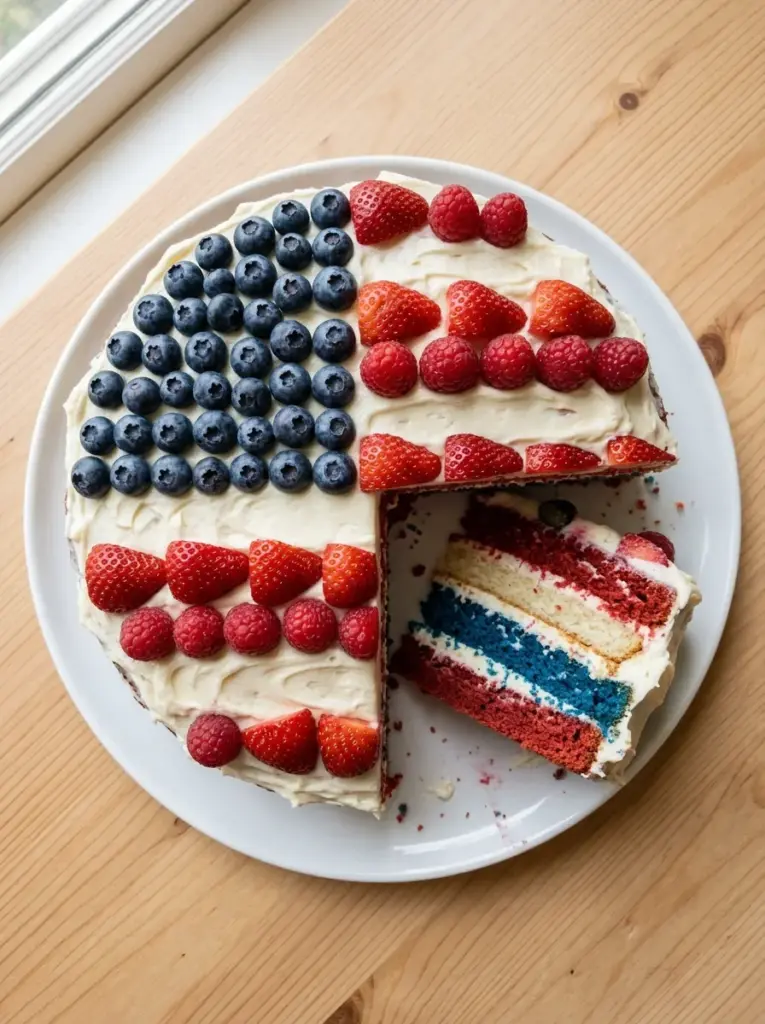
Fresh strawberries, blueberries, raspberries, white chocolate curls, red and blue sprinkles, and white frosting stars all work beautifully. For a simple design, arrange blueberries in the upper corner and use rows of strawberries or raspberries to create the flag effect.
More Dessert Recipes to Try

American Flag Layered Cake
Ingredients
Equipment
Method
- Preheat the oven to 350°F (175°C).
- Grease three 8-inch round cake pans and line the bottoms with parchment paper.
- In a bowl, whisk together the flour, baking powder, and salt.
- In a large bowl, beat the butter and sugar until light and fluffy.
- Add the eggs one at a time, mixing well after each addition.
- Mix in the vanilla extract.
- Gradually add the dry ingredients, alternating with the milk, and mix until just combined.
- Divide the batter evenly among three bowls.
- Tint one portion red and another blue with gel food coloring. Leave the third portion white.
- Pour each batter into a prepared cake pan.
- Bake for 22 to 27 minutes, or until a toothpick inserted into the center comes out clean.
- Let the cakes cool in the pans for 10 minutes, then transfer them to wire racks to cool completely.
- To make the frosting, beat the softened butter until creamy.
- Gradually add the powdered sugar, vanilla extract, salt, and heavy cream.
- Beat until light and fluffy.
- Place the blue cake layer on a cake stand and spread a layer of frosting over the top.
- Add the white cake layer and spread another layer of frosting.
- Place the red cake layer on top.
- Cover the entire cake with a thin layer of frosting to create a crumb coat.
- Refrigerate for 20 to 30 minutes.
- Apply the remaining frosting evenly around the cake and smooth the sides and top.
- Arrange blueberries, raspberries, and strawberries on top to create a red, white, and blue design.
- Refrigerate the finished cake for at least 30 minutes before slicing.
Notes
Gel food coloring provides stronger colors without adding excess liquid to the batter.
Use a serrated knife to level the cake layers if they rise unevenly.
Refrigerating the crumb coat makes the final frosting layer easier to apply.
Fresh berries should be added shortly before serving for the best appearance.
Store the finished cake covered in the refrigerator for up to 4 days.
Enjoying AmandBox? Follow us on Pinterest for more recipes.