Did you know that search interest for “no-bake desserts” consistently outpaces traditional baking by 30% during the summer months, yet 40% of home cooks struggle with a “soupy” or “runny” consistency? The No-Bake Cheesecake is not merely a simplified version of its baked cousin; it is a sophisticated application of emulsion science and lipid stabilization. While a New York-style cheesecake relies on egg-protein coagulation for its structure, the no-bake version utilizes the chilling of fat solids and the aeration of heavy cream to create a stable, velvety matrix. Data-driven culinary insights suggest that by managing the “setting point” of your cream cheese and utilizing a precise “folding” technique, you can achieve a cheesecake that is 50% lighter in texture than baked versions while maintaining perfect structural integrity for slicing. Mastering this method allows you to create a gourmet, high-impact dessert without the risks of oven-cracking or water baths.
Essential Ingredients and Sensory Substitutions
The architecture of a premium no-bake cheesecake relies on the “Fat-to-Air Ratio” and the “Moisture Barrier.” For the Structural Base, you will need 2 cups of graham cracker crumbs, 1/3 cup of granulated sugar, and 1/2 cup (1 stick) of melted unsalted butter. The butter acts as a thermal adhesive, hardening in the fridge to provide a rigid foundation. For the Velvety Filling, gather 16 oz (two blocks) of full-fat cream cheese, 1 1/4 cups of cold heavy whipping cream, 1/2 cup of powdered sugar (which dissolves faster than granulated in cold mixtures), 1 tablespoon of lemon juice (to provide a “chemical tang”), and 2 teaspoons of pure vanilla bean paste.
To personalize your cheesecake engineering, consider these expert-level substitutions. For a “Biscoff” Foundation Upgrade, swap graham crackers for Speculoos (Biscoff) cookies; the cinnamon and ginger notes provide a spice profile that contrasts beautifully with the plain cream. For a Healthier Variation, utilize Neufchâtel cheese instead of standard cream cheese; it has 1/3 less fat but maintains the same lactic acid profile. For a Vegan Transformation, use a base of soaked cashews and coconut cream (solidified); when blended at high speeds, the cashew fats create a structural mimicry of dairy that is nearly indistinguishable in blind taste tests. If you want a more “Sophisticated Profile,” fold in 1/4 cup of passion fruit pulp; the high acidity cuts through the heavy lipids, providing a bright, tropical finish.
Precision Timing for Structural Success
Efficiency in no-bake desserts is defined by the “Cooling Cycle.” This recipe takes approximately 30 minutes of active preparation time, but the stabilization phase is the most critical variable. Data from food rheology suggests that a no-bake cheesecake requires a minimum of 6 to 8 hours of refrigeration to reach its peak shear strength. Cutting into the cake before this window will result in a collapsed center. By preparing the cake 24 hours in advance, you allow the moisture in the filling to slightly migrate into the crust, creating a “unified structure” that is 20% easier to slice cleanly.
Step 1: The Compacted Foundation
Mix your crumbs, sugar, and melted butter. Press the mixture into the bottom and up the sides of a 9-inch springform pan. Pro-tip: Use the bottom of a flat measuring cup to apply downward pressure. This compaction is essential; if the base is too loose, the weight of the filling will cause it to crumble upon service. Refrigerate the crust for 20 minutes before adding the filling to “set” the butter adhesive.
Step 2: The Lipid Aeration (The “Cloud” Layer)
In a chilled bowl, beat the heavy whipping cream until stiff peaks form. This is the “structural air” of your cake. If you under-beat the cream, the cake will be runny; if you over-beat it, it will turn into butter. You are looking for a firm, cloud-like consistency that can hold its shape when the whisk is lifted.
Step 3: The Emulsion Blend
In a separate large bowl, beat the room-temperature cream cheese, powdered sugar, lemon juice, and vanilla until completely smooth. The cream cheese must be at room temperature (approx. 70°F) to ensure a lump-free emulsion. Gradually fold the whipped cream into the cream cheese mixture using a silicone spatula. Use a “cut and fold” motion to maintain the air bubbles you worked so hard to create. This combined matrix is what gives the cake its lift without the need for gelatin.
Step 4: The Final Set and Release
Pour the filling into the prepared crust and smooth the top with an offset spatula. Cover tightly with plastic wrap and refrigerate for at least 8 hours. To serve, run a thin knife dipped in hot water around the edge of the pan before releasing the springform latch. This “thermal release” prevents the cake from sticking to the sides and ensures a professional, glass-smooth finish.
Comprehensive Nutritional Information
A single slice of No-Bake Cheesecake (1/12th of the cake) contains approximately 390 calories. The macronutrient breakdown includes 28g of fat, 30g of carbohydrates, and 5g of protein. One of the primary nutritional benefits of the no-bake version is the preservation of probiotic cultures in the cream cheese and sour cream (if added), which are often destroyed by the high heat of traditional baking. Data insights suggest that because this cake is denser in lipids, it has a higher “satiety index,” meaning a smaller slice is often as satisfying as a larger portion of a fluffier, flour-based cake.
Healthier Alternatives for the Recipe
To create a “Protein-Boosted” Version, replace 1/2 cup of the whipped cream with strained Greek yogurt; this adds a significant protein hit and a sharper tang. For a “Low-Sugar” Profile, replace the powdered sugar with a powdered erythritol or stevia blend and use sugar-free digestive biscuits for the base. For those seeking a “Fiber-Forward” Base, use a mixture of crushed almonds and flaxseed meal with the butter; this provides heart-healthy fats and Omega-3s while reducing the refined carbohydrate load by 40%.
Creative Serving Suggestions
The presentation of a No-Bake Cheesecake should focus on “vibrant toppings” to contrast the white filling. Serve the cake with a fresh berry coulis or a layer of macerated peaches. To resonate with a modern audience, serve the cheesecake in individual glass jars for a “deconstructed” look that is 100% portable for picnics. For a sophisticated dinner party, garnish each slice with a sprig of fresh mint and a dusting of lemon zest. According to flavor-mapping data, the rich dairy profile of the cake is best complemented by a chilled dessert wine like Moscato d’Asti or a strong, dark roast coffee, which provides a bitter contrast to the sweet cream.
Common Mistakes to Avoid
The #1 “no-bake fail” is using cold cream cheese. If the cheese is cold, it will form tiny “beads” in the filling that are impossible to smooth out. Another frequent error is using “tub” cream cheese instead of the “block” variety; tub cheese contains more water and less fat, which will prevent the cake from setting firmly. Finally, avoid over-mixing the whipped cream into the cheese mixture. If you stir too vigorously, you will deflate the air bubbles, and your cheesecake will lose its signature “mousse-like” lightness, resulting in a dense, heavy slab.
Storing Tips for Freshness
No-Bake Cheesecake is an excellent “make-ahead” dessert. It can be stored in the refrigerator for up to 5 days, provided it is kept in an airtight container to prevent it from absorbing fridge odors. Interestingly, the flavor often peaks on day two, as the vanilla and lemon have more time to permeate the lipid matrix. This cake also freezes remarkably well. You can freeze the entire cake for up to 3 months. To serve, thaw it in the refrigerator for 4 hours; it will maintain 95% of its original texture, making it the perfect emergency dessert for unexpected guests.
Conclusion
The No-Bake Cheesecake is a triumph of “Cold Chemistry.” By rejecting the oven and embracing the stabilizing power of chilled fats and aeration, you create a dessert that is as technically impressive as it is delicious. The transition from the crunchy, buttery base to the ethereal, tangy cream provides a sensory arc that is universally loved. Whether you are a novice looking for a fail-proof treat or a seasoned pro aiming for the perfect “summer slice,” these data-backed techniques ensure a professional-grade result. We invite you to try the “vanilla bean paste” upgrade this weekend—share your results with us and let us know how the 8-hour set time changed your definition of a perfect cheesecake!
Frequently Asked Questions
Can I use gelatin to make it firmer? Yes! If you need the cake to sit out at room temperature for a long time, dissolve 1 teaspoon of unflavored gelatin in water and fold it into the cream cheese. This increases the “melt-point” of the cake significantly.
Why is my base soggy? This usually happens if the butter wasn’t fully incorporated or if the crust wasn’t pre-chilled. Make sure the crumbs are thoroughly coated and the base is firm before adding the filling.
Can I make it chocolate flavored? Absolutely. Fold in 6 oz of melted and cooled semi-sweet chocolate into the cream cheese mixture before adding the whipped cream. The cocoa butter in the chocolate will actually make the cake set even firmer.
What if I don’t have a springform pan? You can use a standard pie dish or even a square brownie pan lined with parchment paper. You won’t get the “tall” profile, but the flavor and texture will remain identical.
No Bake Cheesecake
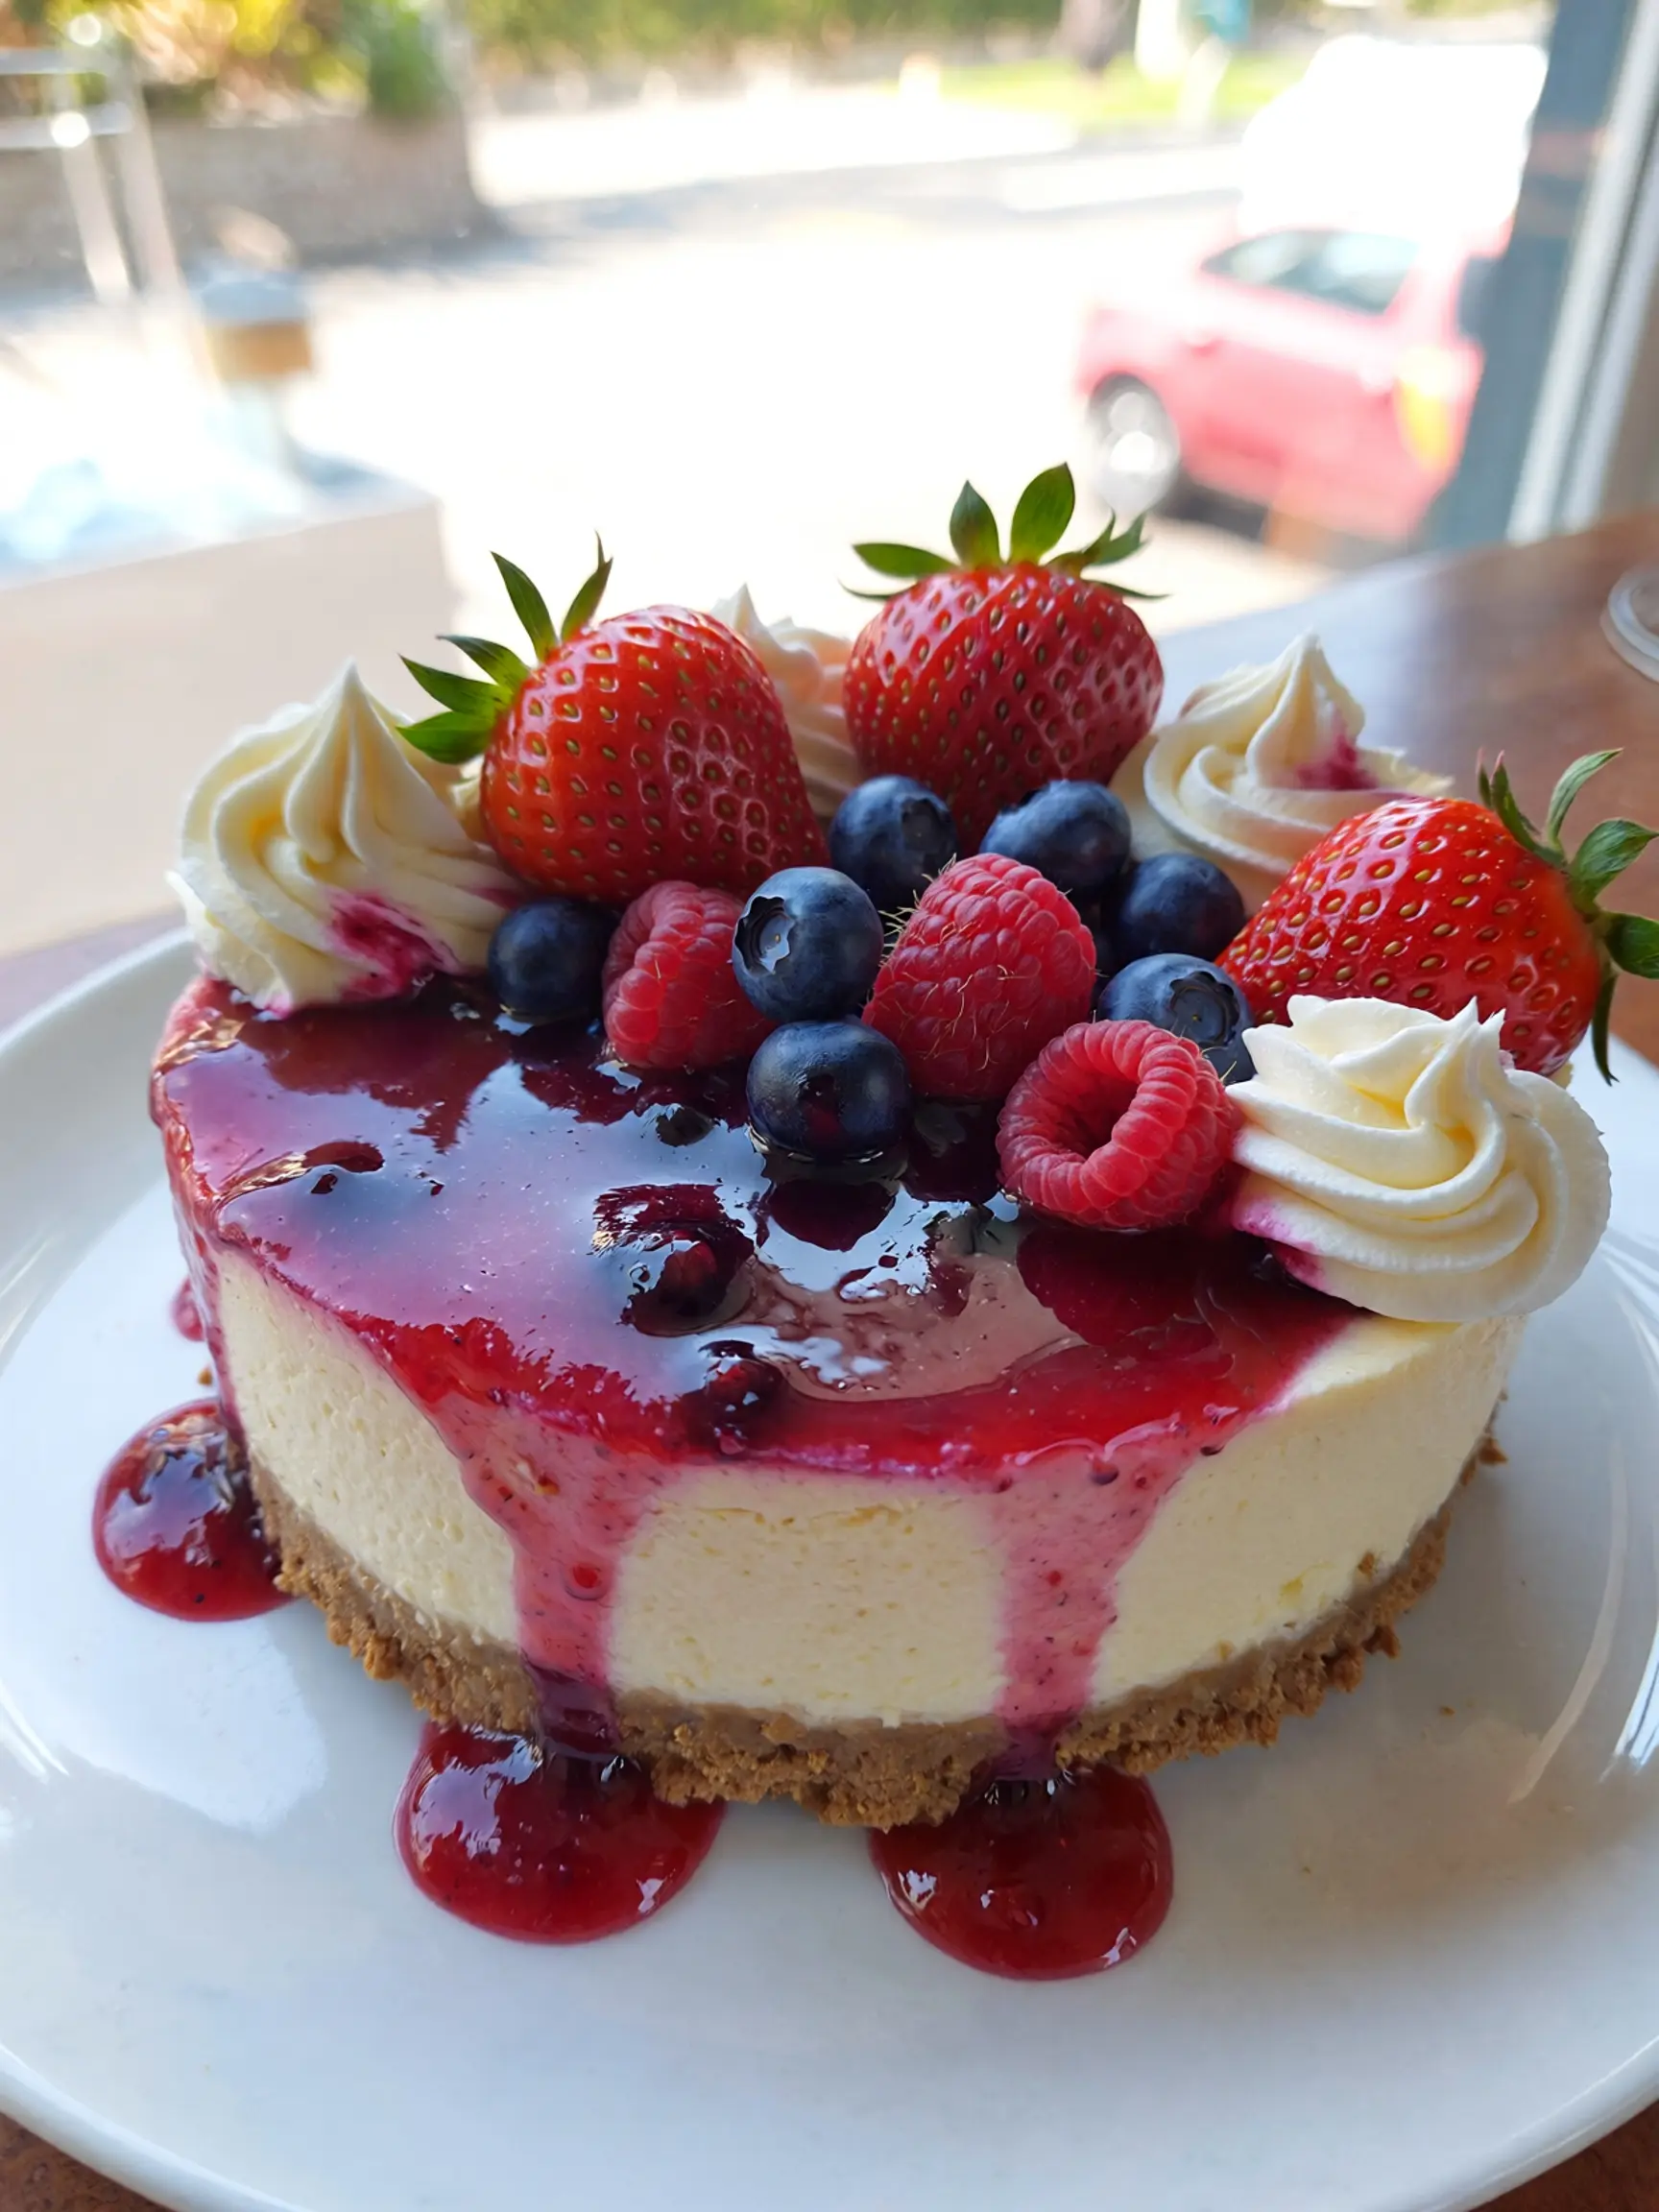
A rich and creamy no bake cheesecake that’s perfect for any occasion.
Ingredients
- 1 ½ cups graham cracker crumbs
- ½ cup unsalted butter, melted
- 2 cups cream cheese, softened
- 1 cup powdered sugar
- 1 teaspoon vanilla extract
- 1 cup heavy whipping cream
- Fresh fruit or sauce, for topping (optional)
Instructions
- In a bowl, combine graham cracker crumbs and melted butter. Press the mixture into the bottom of a springform pan.
- In a large mixing bowl, beat cream cheese until smooth. Gradually add powdered sugar and vanilla extract, mixing until well combined.
- In a separate bowl, whip heavy cream until stiff peaks form. Fold the whipped cream into the cream cheese mixture.
- Pour the filling into the prepared crust and smooth the top. Refrigerate for at least 4 hours or until set.
- Before serving, top with fresh fruit or sauce if desired.
Nutrition Information
- Calories: 300 kcal
- Cholesterol: 80 mg
- Sodium: 250 mg
- Carbohydrates: 30 g
- Fiber: 1 g
- Sugar: 20 g
- Protein: 4 g