
Apple Oatmeal Crisp
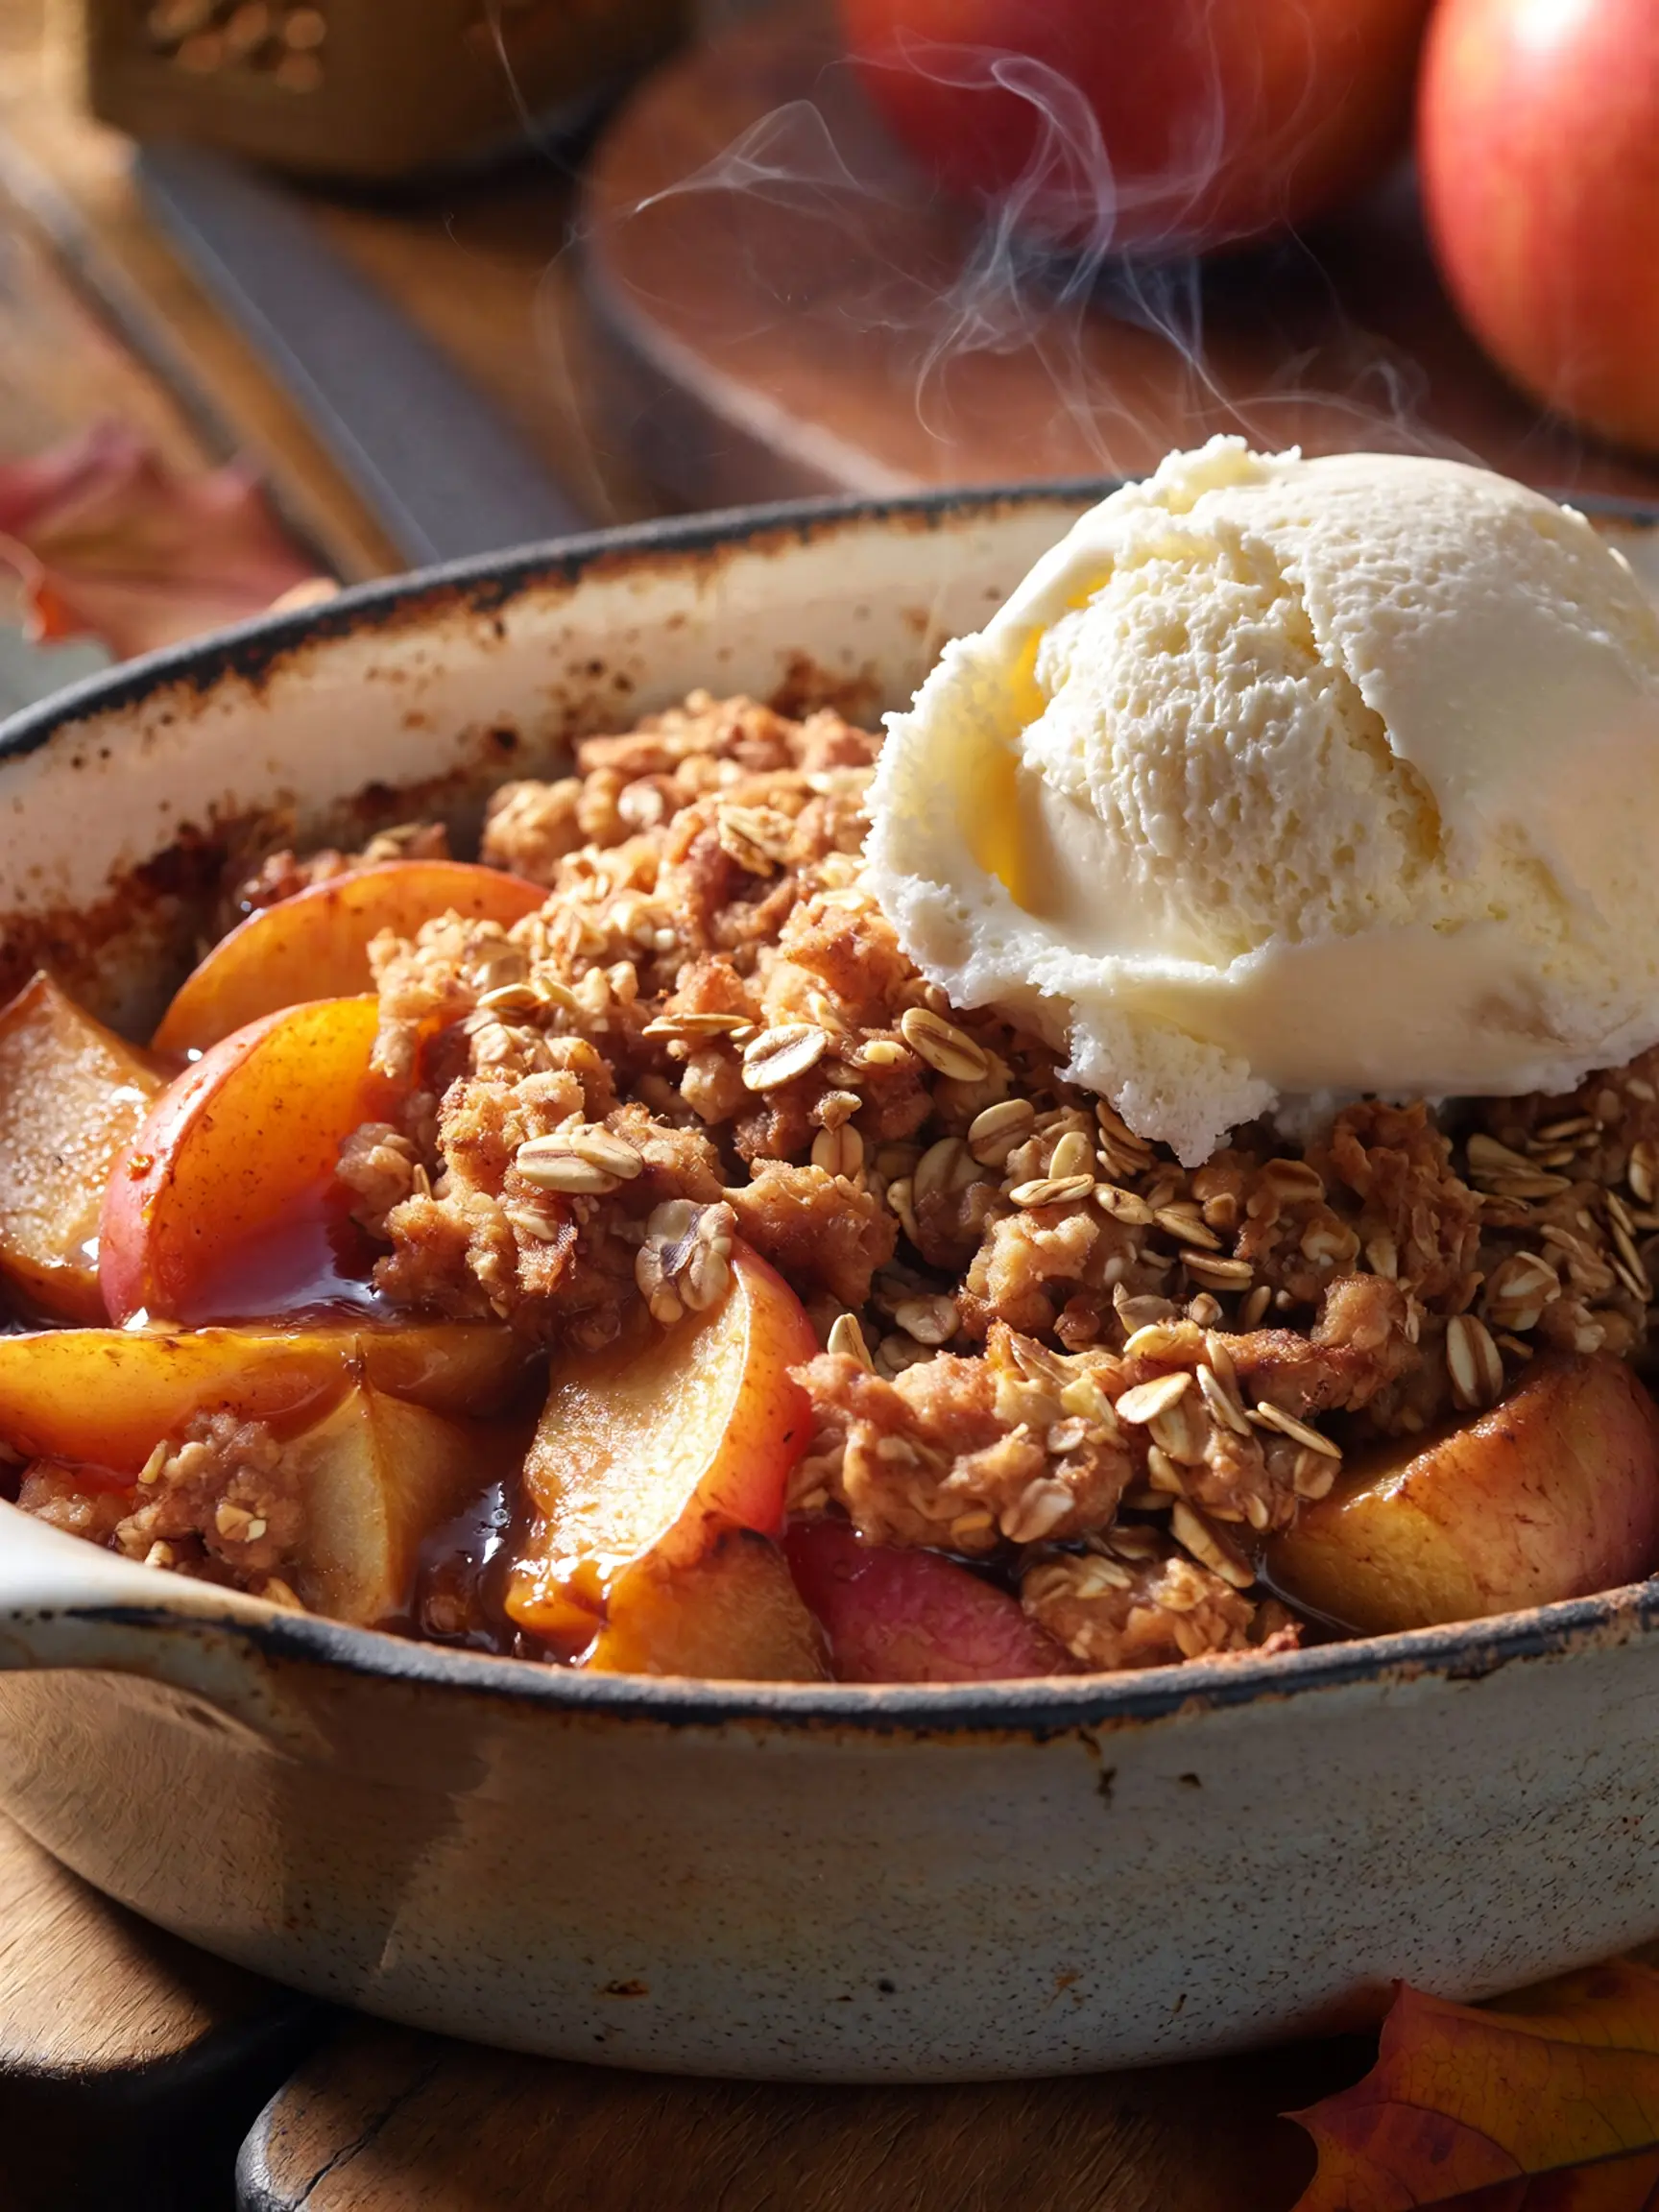
There are few desserts as comforting as a warm Apple Oatmeal Crisp fresh from the oven. Tender apples are baked beneath a golden, buttery oatmeal topping that becomes wonderfully crisp around the edges while soaking up the sweet, cinnamon-spiced apple juices underneath.
This Apple Oatmeal Crisp is simple enough for a weeknight dessert but special enough for a holiday table. It comes together with everyday ingredients, requires no complicated pastry techniques, and fills the kitchen with the irresistible aroma of baked apples, cinnamon, and brown sugar.
Serve it warm with a scoop of vanilla ice cream or a spoonful of whipped cream for the ultimate cozy dessert. Whether you are using freshly picked apples in the fall or baking a comforting treat for family and friends, this Apple Oatmeal Crisp is an easy classic you will want to make again and again.
Table of Contents
Ingredients
Apple oatmeal crisp requires very few ingredients — and that brevity is the point. Every component is familiar, accessible, and affordable. The quantities below fill a 9×13-inch baking dish and serve 10–12 generously.
For the Apple Filling:
- 2.5 lbs (about 1.1 kg) apples — approximately 6 medium apples — peeled, cored, and sliced into ¼-inch thick wedges (see apple variety notes below)
- ¼ cup (50g) granulated sugar
- 2 tablespoons light brown sugar, packed
- 2 tablespoons all-purpose flour (thickens the juices released during baking)
- 1½ teaspoons ground cinnamon
- ¼ teaspoon ground nutmeg
- ⅛ teaspoon ground cloves
- ⅛ teaspoon ground ginger
- ½ teaspoon pure vanilla extract
- 1 tablespoon fresh lemon juice (brightens the filling and prevents the apples from browning)
- 1 teaspoon lemon zest (amplifies the brightness without adding liquid)
For the Oatmeal Crisp Topping:
- 1½ cups (135g) old-fashioned rolled oats — not quick oats and absolutely not instant oats (quick oats turn mushy; instant oats disappear entirely; old-fashioned oats retain their texture and provide the crisp’s characteristic chew and crunch)
- ¾ cup (90g) all-purpose flour
- ¾ cup (165g) light brown sugar, packed
- 1 teaspoon ground cinnamon
- ¼ teaspoon fine sea salt
- ½ cup (113g) unsalted butter, cold and cut into ½-inch cubes (cold butter is essential — it creates distinct, pebble-like clumps rather than a smooth paste)
- ½ cup (55g) chopped pecans or walnuts (optional but deeply recommended — they add a toasty richness and additional crunch that elevates the topping significantly)
Apple Variety Guide: The apple you choose matters considerably. Granny Smith apples are the gold standard for baking — they are tart, hold their shape beautifully, and do not turn to mush. Honeycrisp apples add natural sweetness and a pleasant soft texture. Braeburn apples offer a balanced sweet-tart flavor and excellent structure. Fuji apples are very sweet and soften more than the others — use them at a maximum of 50% of the total apple quantity. The very best apple crisps use a combination of two varieties — typically one tart and one sweet — for a more complex, dimensional filling.
Smart Substitutions: No all-purpose flour for the topping? Use oat flour (made by blending oats) for a fully gluten-free topping that still provides excellent structure. Dairy-free? Replace the butter with cold refined coconut oil — it has a high saturated fat content that behaves similarly to butter in the topping and produces excellent crunch. No fresh lemon? A teaspoon of apple cider vinegar provides the necessary acidity in the filling. Want to add raisins or dried cranberries? Stir ½ cup into the apple filling before baking — they plump in the heat and add bursts of concentrated sweetness throughout.
Timing
Apple oatmeal crisp is genuinely one of the most practical desserts available to a home baker. The prep is simple, the bake is mostly unattended, and the result is spectacular. Total time is 1 hour from first apple peeled to first spoonful served.
- Prep Time: 20 minutes (peeling and slicing apples, making the topping)
- Cook Time: 40–45 minutes
- Total Time: 1 hour to 1 hour 5 minutes
- Servings: 10–12
- Difficulty Level: Very Easy
Pro Timing Tip: Apple oatmeal crisp holds exceptionally well after baking — it can sit at room temperature, loosely tented with foil, for up to 4 hours after coming out of the oven and still be warm and delicious when served. This makes it a remarkably stress-free dessert for dinner parties and gatherings, where timing the dessert course precisely is often the most stressful part of the evening. Bake it before guests arrive, tent it, and reheat briefly if needed — done.
Step 1: Prepare the Apple Filling
Preheat the oven to 350°F (175°C). Butter a 9×13-inch baking dish generously — both the bottom and sides. Peel, core, and slice the apples into even ¼-inch wedges. Uniformly sized apple slices are important for even cooking — slices that are too thick will be undercooked and crunchy at the center of the dish while those that are too thin will dissolve into applesauce. A ¼-inch thickness is the sweet spot that produces tender, yielding apple slices that hold their shape and provide pleasant resistance to the spoon.
Place the sliced apples in a large mixing bowl. Add the granulated sugar, brown sugar, flour, cinnamon, nutmeg, cloves, ginger, vanilla extract, lemon juice, and lemon zest. Toss thoroughly until every apple slice is evenly coated in the spiced sugar mixture. The flour will dissolve into the apple juices during baking, thickening the filling into a silky, lightly syrupy sauce that pools between the apple slices and soaks up into the crisp topping from below.
Taste a piece of the seasoned apple. Adjust if needed — more cinnamon, more sugar if the apples are very tart, or a touch more lemon juice if they are very sweet. This is your only opportunity to adjust the filling before it goes into the oven, so taste deliberately.
Transfer the apple mixture to the prepared baking dish, spreading it into an even layer. The filling should come approximately two-thirds of the way up the sides of the dish — leaving room for the topping without the dish overflowing as the apples release their juices during baking.
Step 2: Make the Oatmeal Crisp Topping
In a large mixing bowl, combine the rolled oats, all-purpose flour, brown sugar, cinnamon, and salt. Whisk briefly to distribute everything evenly. Add the cold, cubed butter to the dry mixture. Using your fingertips, press and rub the butter into the dry ingredients — working quickly to prevent the butter from warming — until the mixture resembles coarse, irregular pebbles ranging from pea-sized to almond-sized clumps. There should be no large unbroken chunks of butter and no completely smooth, homogenous mixture. The irregular, varied texture of the clumps is what produces the range of crispy, crunchy, and chewy textures that define a great oat topping.
If using pecans or walnuts, add them now and toss to incorporate. The nuts should be roughly chopped — not fine, not whole — so they provide distinct textural contrast without dominating any single bite. Refrigerate the topping for 5 minutes if the kitchen is warm or if the butter has softened significantly during the process — returning the butter to a cold, firm state before baking ensures the topping stays crumbly and distinct rather than melting into a smooth paste.
Step 3: Assemble and Bake
Scatter the oatmeal crisp topping evenly over the apple filling, covering the surface completely from edge to edge. Press very gently — just enough to create a relatively even layer. Do not press firmly or pack the topping down tightly. A loosely scattered topping with natural air pockets between the oat clumps bakes into a craggy, varied, spectacularly crunchy surface. A packed topping bakes into a flat, dense, considerably less exciting one.
Place the baking dish on a rimmed baking sheet — this is not optional. Apple crisps bubble vigorously as the fruit releases its juices during baking, and those juices will overflow the dish and onto the oven floor if you do not have a catching surface beneath. A rimmed baking sheet also promotes more even bottom heat distribution, which helps the filling cook through more uniformly.
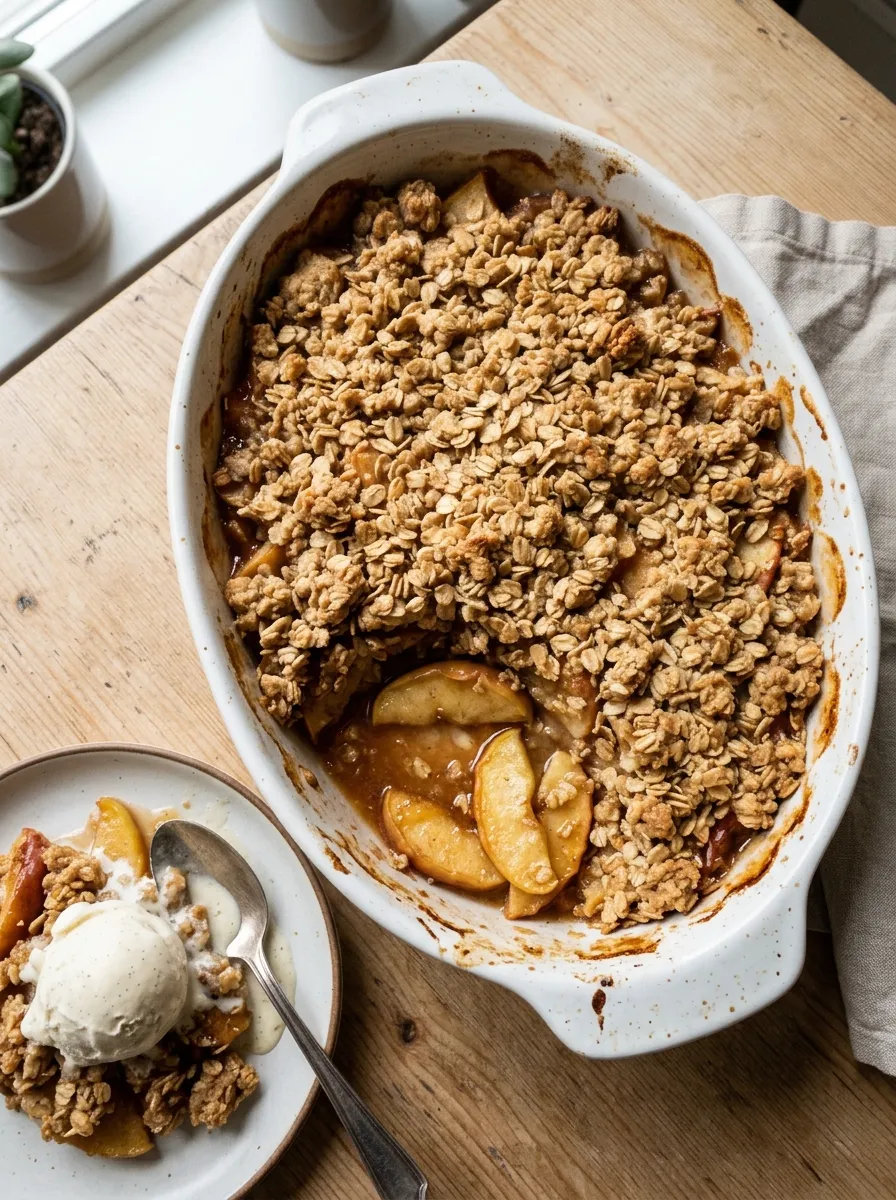
Bake at 350°F for 40–45 minutes. The crisp is done when the topping is deep golden brown across the entire surface, the apple filling is bubbling actively and visibly at the edges of the dish, and the kitchen smells extraordinary — warm cinnamon, toasted oats, caramelized sugar, and baked apple creating an aroma that is one of the most welcoming and appetite-awakening things a home oven can produce. If the topping is browning too quickly before the filling has had time to bubble, tent loosely with aluminum foil and continue baking until the filling is fully active.
Step 4: Rest Before Serving
Remove the crisp from the oven and let it rest on a wire rack for at least 10 minutes before serving. This resting period allows the filling to thicken from its initial molten, very fluid state into a properly saucy, cohesive consistency that holds together when spooned into a bowl. Serving immediately out of the oven produces a filling that is too liquid and pools around the topping in an unappetizing way. Ten minutes of patience produces a filling that is silky, lightly thickened, and perfectly saucy.
Step 5: Serve at the Perfect Temperature
Spoon generous portions into wide, shallow bowls — the width allows the topping to remain on top of the filling rather than sliding off to the side. Place a large, generous scoop of vanilla ice cream directly on top of the warm crisp. Do not place the ice cream beside the crisp — place it directly on top. The ice cream melts from below where it contacts the warm filling and from above where the bowl heat reaches it, creating a river of creamy vanilla that mixes with the cinnamon apple filling in a way that is one of the great simple pleasures of the dessert world.
Serve immediately — the contrast between the warm crisp and the cold, melting ice cream is at its most dramatic and most delicious in the first two to three minutes after plating.
Nutritional Information
Based on one serving (approximately one tenth of the full 9×13-inch crisp, without ice cream or accompaniments):
| Nutrient | Amount Per Serving |
|---|---|
| Calories | ~320 kcal |
| Protein | 4g |
| Total Fat | 12g |
| Saturated Fat | 6g |
| Carbohydrates | 52g |
| Fiber | 4g |
| Sugars | 30g |
| Sodium | 65mg |
| Calcium | 35mg |
| Iron | 1.4mg |
| Potassium | 185mg |
| Vitamin C | 6mg |
Nutritional Context: At 320 calories per serving, apple oatmeal crisp is one of the most calorie-efficient satisfying desserts available — significantly lower than pie (typically 410–500 calories per slice), cheesecake (450–550 calories), or layer cake (550–650 calories). The rolled oats contribute meaningful beta-glucan fiber, which research published in the American Journal of Clinical Nutrition has shown reduces LDL cholesterol and supports healthy blood sugar regulation. The apples provide pectin — a soluble fiber — alongside quercetin, a flavonoid antioxidant. This is a dessert you can feel genuinely good about serving.
Healthier Alternatives for the Recipe
Apple oatmeal crisp is already one of the more nutritionally balanced desserts in a home baker’s repertoire. These modifications make it even more health-forward without compromising the warmth and comfort that is the entire point of the dish.
Reduce the Added Sugar: Decrease the granulated sugar in the filling from ¼ cup to 2 tablespoons — particularly if using naturally sweet apple varieties like Honeycrisp or Fuji. The cinnamon and vanilla provide enormous perceived sweetness without contributing calories. In the topping, reduce the brown sugar from ¾ cup to ½ cup. The topping will be slightly less sweet but the caramelized oats will be just as crispy and satisfying. Total sugar reduction across the whole dish: approximately 25%.
Add Nutritional Power: Replace ¼ cup of the all-purpose flour in the topping with ground flaxseed — it provides omega-3 fatty acids, lignans, and additional fiber that are entirely invisible in the finished crisp. Stir 2 tablespoons of hemp seeds into the apple filling before baking — they are completely flavorless but add complete protein and beneficial fatty acids to every serving.
Make It Fully Gluten-Free: Replace the all-purpose flour in both the filling and the topping with certified gluten-free oat flour or a 1:1 gluten-free baking flour blend. Use certified gluten-free rolled oats. Every other ingredient in the standard recipe is naturally gluten-free — this is a very easy adaptation that requires no technique adjustment whatsoever.
Reduce the Butter: Decrease the butter in the topping from ½ cup to 6 tablespoons and add 2 tablespoons of unsweetened applesauce. The applesauce provides moisture and binding without fat, and its mild apple flavor integrates seamlessly with the fruit filling below. Saturated fat per serving drops by approximately 25%.
Boost the Protein: Stir ¼ cup of old-fashioned peanut butter or almond butter into the topping along with the butter — use your fingertips to work it in along with the cold butter. The nut butter adds a deeply nutty richness, binds the topping more cohesively, and adds approximately 3 grams of protein per serving. It also produces a particularly beautiful, dark golden color on the topping surface.
Serving Suggestions
Apple oatmeal crisp is joyfully versatile — it moves effortlessly between casual family dinner and elegant entertaining with minimal adjustment.
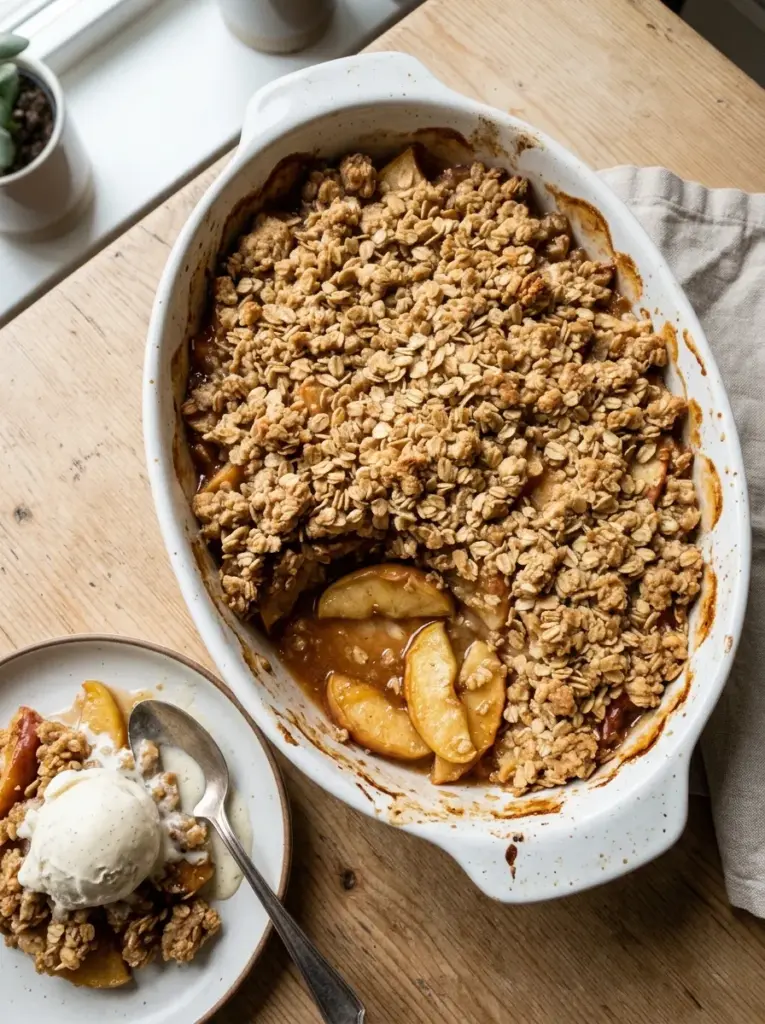
The Classic: A generous scoop of vanilla bean ice cream placed directly on top of a warm serving of crisp. This is the combination against which all other dessert pairings are measured and it has never been improved upon. Use the best vanilla ice cream you can find — one with visible vanilla bean flecks and a clean, cream-forward flavor. The quality of the ice cream is immediately perceptible against the warm, spiced filling.
With Salted Caramel Sauce: Drizzle warm salted caramel sauce over the top of the crisp before adding the ice cream. The caramel amplifies the already-present caramelization notes in the topping, adds a salty-sweet richness to the cinnamon apple filling, and produces a dessert that is difficult to describe without using the word “extraordinary.”
With Whipped Cream: Freshly whipped heavy cream with a teaspoon of vanilla and a tablespoon of powdered sugar is the lighter, more delicate alternative to ice cream. It melts into the warm crisp in a different way — thinner and more evenly distributed — and its subtle sweetness lets the apple and cinnamon flavors take the lead more fully.
With Crème Fraîche: A generous spoonful of cold, tangy crème fraîche alongside a warm serving of apple crisp is the most sophisticated presentation available. The slight sourness of the crème fraîche cuts through the sweetness of the filling in a way that feels genuinely refined, and the temperature contrast is as dramatic as with ice cream.
For Breakfast: This is not a joke — apple oatmeal crisp is a legitimately appropriate breakfast. Served at room temperature or gently warmed, topped with plain Greek yogurt rather than ice cream, it provides whole grain oats, fruit, and dairy in a form that is more delicious than any granola bowl and arguably more nutritious than a bakery muffin. Embrace this.
At a Holiday Table: Serve alongside pumpkin pie and pecan pie as the third dessert on a Thanksgiving or Christmas table. The lighter, fruit-forward character of the apple crisp provides a welcome contrast to the richer, denser holiday pies and is consistently the first dessert to disappear from the table.
Common Mistakes to Avoid
These are the errors that most frequently prevent an apple oatmeal crisp from reaching its uncomplicated, spectacular potential.
Using the wrong oats: Quick oats and instant oats absorb moisture too rapidly during baking, turning from distinct grains into a soft, indistinct paste. Old-fashioned rolled oats are the only correct choice — they retain their individual structure, provide genuine chew, and produce the distinctive crunchy-crispy-chewy texture that defines the topping. This is a non-negotiable specification.
Using warm or melted butter in the topping: Warm butter produces a smooth, cohesive paste rather than distinct, irregular clumps. The clumps are what bake into the varied, craggy, textured surface that defines a great crisp topping. Always start with cold butter straight from the refrigerator and work quickly.
Slicing the apples too thick or too thin: Apples sliced thicker than ½ inch will be undercooked and waxy-textured while the topping is already perfectly browned. Apples sliced thinner than ⅛ inch will dissolve into applesauce. A consistent ¼-inch slice produces the ideal balance of tenderness and structure in the finished filling.
Skipping the baking sheet underneath: Apple filling bubbles vigorously during baking and will overflow the dish onto the oven floor, producing smoke, a burning smell, and a significant cleanup project. Always place a rimmed baking sheet underneath the baking dish — always.
Not baking long enough: The single most reliable indicator of a done apple crisp is bubbling filling visible at the edges. If the filling is not actively bubbling, the apples have not fully cooked and the juices have not thickened. A beautifully browned topping on top of undercooked, watery filling is disappointing in a specific way. Wait for the bubble.
Serving immediately out of the oven: The filling needs 10 minutes to thicken from its initial molten state. Serve too early and the filling pours out of the bowl rather than sitting beneath the topping. Ten minutes of patience is the most impactful single thing you can do between the oven and the table.
Storing Tips for the Recipe
At Room Temperature: Apple oatmeal crisp can sit at room temperature, loosely covered with a clean kitchen towel or foil, for up to 24 hours after baking. The topping will soften slightly as it sits and absorbs moisture from the filling — this is normal and inevitable.
Refrigerating: Cover the baking dish tightly with foil or plastic wrap and refrigerate for up to 4 days. The topping will lose some of its initial crunch during refrigeration — this is unavoidable — but the flavor of the filling deepens beautifully as the spices continue to meld.
Reheating for Best Results: Cover the dish with foil and reheat in a 325°F oven for 20–25 minutes until the filling is bubbling at the edges and the crisp is warmed through. Remove the foil for the last 5 minutes to re-crisp the topping as much as possible. The oven method restores the topping to approximately 80% of its original crunch — far superior to the microwave, which warms quickly but produces a soft, steamed topping.
Reheating Individual Portions: For single servings, use the microwave on 50% power for 90 seconds, then full power for 30 seconds — this gentler approach prevents the filling from becoming too liquid. Alternatively, an air fryer at 325°F for 5–6 minutes restores remarkable crunch to individual portions and is the best single-serving reheating method available.
Freezing: Baked apple crisp freezes well for up to 3 months. Allow to cool completely, then cover the entire baking dish tightly with plastic wrap and then foil, or portion into individual freezer-safe containers. Thaw overnight in the refrigerator and reheat in a 325°F oven covered with foil until warmed through, then uncovered for 10 minutes to restore the topping texture.
Make-Ahead Strategy: The oatmeal crisp topping can be made up to 3 days in advance and stored in an airtight container in the refrigerator, or up to 1 month in advance and frozen in a zip-lock bag. The apple filling can be assembled and stored in the baking dish covered with plastic wrap in the refrigerator for up to 8 hours before baking. This splits the dessert preparation across multiple days and reduces day-of effort to simply adding the topping and sliding the dish into the oven — an ideal approach for hosting.
Conclusion
Apple oatmeal crisp is the dessert equivalent of a deep breath on a cold autumn afternoon. It asks very little of the person making it — a bag of apples, a bowl, an oven, 20 minutes of active work — and gives back something that is warm, generous, deeply comforting, and genuinely delicious in the way that only simple, honest food made with care can be.
There are no techniques to master, no equipment to buy, no skills to develop. There is only the pleasure of assembling good ingredients in the right order, baking them at the right temperature for the right amount of time, and serving the result warm with a generous scoop of vanilla ice cream to someone you care about — or to yourself, which is equally valid and equally worthy of a generous scoop.
Make this crisp this fall. Make it more than once. Make it when the first cold night arrives and you want something that smells like the season. Make it for a dinner party and watch it disappear faster than anything else on the table. Make it the morning after and eat it for breakfast with Greek yogurt and no apologies.
Share your experience in the comments below — which apple variety did you use, did you add nuts to the topping, and did you serve it with ice cream or whipped cream? We want to hear every detail. And if this recipe has inspired you to explore the world of fruit-forward baked desserts, visit our [Peach Cobbler with Brown Sugar Biscuit Topping], [Blueberry Buckle with Lemon Streusel], and [Pear and Ginger Galette with Almond Cream] — each one built on the same philosophy of seasonal fruit, simple technique, and maximum comfort.
FAQs
Q: What is the difference between apple crisp, apple crumble, and apple cobbler? These three desserts are related but distinct. Apple crisp features a topping of oats, flour, butter, and sugar — the oats are the defining characteristic that produce the “crisp” texture the name promises. Apple crumble uses a topping of flour, butter, and sugar without oats — producing a sandier, more uniform, less textured crust that is more common in British baking. Apple cobbler features a biscuit or cake batter topping that is dropped over the fruit and bakes into a soft, bread-like crust — no oats, no crumble, just biscuit dough over fruit. All three are delicious; the crisp is the most texturally interesting of the three.
Q: Which apples are best for apple crisp? Granny Smith apples are the gold standard for baking — they are tart, hold their shape through the long bake time, and do not release excessive liquid. Honeycrisp apples add natural sweetness and a pleasant, slightly soft texture. Braeburn is the best single variety for balanced flavor and structure. The very best approach is to use a 50/50 combination of Granny Smith and Honeycrisp — the tart apples provide structure and complexity while the sweet apples add natural sugar and a tender texture that complements the firm slices. Avoid Red Delicious apples entirely — they become mealy and flavorless when baked.
Q: Can I make apple crisp without flour in the topping? Yes — replace the all-purpose flour with an equal weight of oat flour (blend rolled oats in a food processor until fine), almond flour, or a certified gluten-free 1:1 baking blend. Oat flour produces the most seamlessly integrated result since it shares flavor characteristics with the rolled oats already in the topping. Almond flour produces a richer, nuttier, more golden topping with a slightly denser texture. Both work beautifully.
Q: My topping turned out soggy and soft rather than crispy. What went wrong? Several possible causes: the butter was too warm when mixed into the topping and produced a paste rather than clumps; the topping was packed too firmly before baking rather than scattered loosely; the oven temperature was too low; or the crisp was not baked long enough for the topping to fully caramelize and set. Ensure you are using cold butter straight from the refrigerator, scattering rather than packing the topping, verifying your oven temperature with a thermometer, and baking until the topping is deep golden brown — not just lightly colored.
Q: Can I make this recipe in individual portions? Absolutely — and individual ramekins produce a beautiful, restaurant-style presentation. Use six to eight 8-oz ramekins, divide the filling and topping evenly among them, and bake at 350°F for 25–30 minutes until bubbling and golden. Individual portions bake faster than a large baking dish because the heat penetrates more quickly from all sides. The individual presentation is particularly impressive for dinner parties — each guest receives their own perfectly proportioned, perfectly browned personal crisp.
Q: How do I prevent my apple filling from being too watery? Three strategies work together. First, use the correct flour quantity in the filling — the 2 tablespoons of flour specified in this recipe thickens the released apple juices into a silky sauce rather than a watery pool. Second, use baking apples with lower water content — Granny Smith releases considerably less liquid than softer varieties. Third, let the assembled crisp rest for 10 minutes after baking before serving — this allows the filling to thicken to its proper consistency as it cools slightly from its initial molten state.
Q: Can I add other fruits to the apple filling? Yes — and some combinations are extraordinary. Apple and pear is a natural pairing that adds floral sweetness and a softer texture. Apple and cranberry produces a beautifully tart, vibrantly colored filling that is perfect for the Thanksgiving table. Apple and blueberry is a summer-meets-fall combination that feels festive and unusual. Apple and quince, if you can find quince, produces a deeply perfumed, slightly jammy filling that is genuinely spectacular. When adding secondary fruits, reduce the apple quantity by the same weight as the fruit being added to keep the total filling volume consistent.
More Dessert Recipes to Try
- Keto Pumpkin Donuts Air Fryer Style
- Keto Fat Bombs Chocolate Peanut Butter
- Marshmallow Snowman Treats

Apple Oatmeal Crisp
Ingredients
Equipment
Method
- Preheat the oven to 350°F (175°C).
- Lightly grease a 9×9-inch baking dish.
- Add the sliced apples to a large mixing bowl.
- Add the sugar, flour, cinnamon, nutmeg, lemon juice, and vanilla extract.
- Toss until the apples are evenly coated.
- Transfer the apple mixture to the prepared baking dish and spread it evenly.
- In a separate bowl, combine the oats, flour, brown sugar, cinnamon, and salt.
- Pour in the melted butter and stir until a crumbly mixture forms.
- Sprinkle the oat topping evenly over the apples.
- Bake for 40 to 45 minutes, until the apples are tender and the topping is golden brown.
- Remove from the oven and let the crisp rest for 10 to 15 minutes.
- Serve warm with vanilla ice cream or whipped cream if desired.
Notes
Slice the apples evenly so they cook at the same rate.
Old-fashioned rolled oats provide the best texture for the topping.
If the topping browns too quickly, loosely cover the dish with foil during the final part of baking.
Store leftovers covered in the refrigerator for up to 4 days.
Reheat individual portions in the microwave or oven before serving.
Enjoying AmandBox? Follow us on Pinterest for more recipes.