
Haunted Forest Cake
Introduction
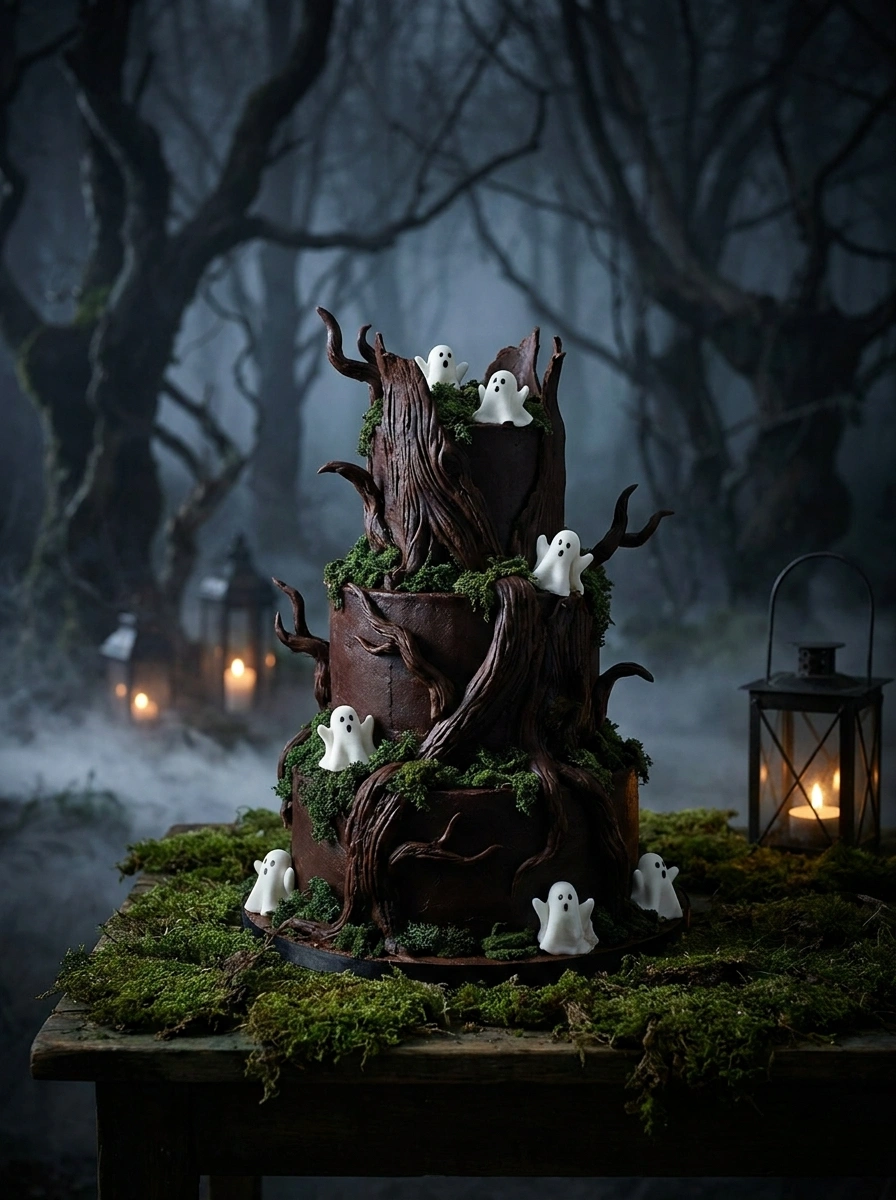
As Halloween approaches, many of us begin looking for unique and thrilling ways to celebrate the spooky season. One of the most creative ways to pay homage to this haunting time of the year is with a stunning Haunted Forest Cake. This cake is not only visually captivating with its eerie yet delicious design, but it also provides an exciting opportunity for bakers of all levels to express their creativity in the kitchen. Combining flavorful ingredients, decorations, and a dash of imagination, the Haunted Forest Cake will surely impress your friends and family. If you want to immerse yourself in the festive spirit of Halloween, let’s step into this hallmark of seasonal baking!
Table of Contents
Ingredients List
To create this Haunted Forest Cake, you’ll need the following ingredients to achieve that perfect taste and frightful appearance:
For the Cake
– 2 cups all-purpose flour
– 1 ¾ cups granulated sugar
– ¾ cup unsweetened cocoa powder
– 1 ½ tsp baking powder
– 1 ½ tsp baking soda
– 1 tsp salt
– 2 large eggs
– 1 cup whole milk
– ½ cup vegetable oil
– 2 tsp vanilla extract
– 1 cup boiling water
For the Frosting
– 1 cup unsalted butter (softened)
– 4 cups powdered sugar
– ½ cup unsweetened cocoa powder
– ¼ cup heavy cream
– 1 tsp vanilla extract
For Decoration
– Edible gummy worms
– Crushed chocolate cookies (to resemble dirt)
– Marzipan mushrooms
– Black food coloring
– Green and brown food coloring (for grass and trees)
– Assorted spooky decorations (skulls, spiders, etc.)
Timing
Understanding the timing for this Haunted Forest Cake is essential for an enjoyable baking experience. The preparation and cooking timeline breaks down as follows:
– Preparation Time: 30 minutes
– Baking Time: 30-35 minutes
– Cooling Time: 1 hour
– Frosting Preparation: 15 minutes
– Decoration Time: 30 minutes
In total, you should allocate about 2.5 to 3 hours from start to finish. This gives you sufficient time to prepare your ingredients, bake the cake, let it cool, and bring your haunted vision to life through decoration.
Step-by-Step Instructions
Creating your Haunted Forest Cake is straightforward, yet it allows for plenty of room to get creative. Follow these clear instructions for a delectable dessert:
1. Preheat Your Oven: Set your oven to 350°F (175°C) to prepare for baking.
2. Mix Dry Ingredients: In a large bowl, sift together the flour, granulated sugar, cocoa powder, baking powder, baking soda, and salt to create a well-blended dry mix.
3. Combine Wet Ingredients: In a separate bowl, whisk together the eggs, milk, vegetable oil, and vanilla extract until everything is combined well.
4. Incorporate Dry Mixture: Slowly pour the wet ingredients into the dry mixture, mixing gently until just incorporated. Be careful not to overmix.
5. Add Boiling Water: Stir in the boiling water; the batter will be thin, but this is expected and will contribute to a moist cake.
6. Bake the Cake: Divide the batter evenly into two greased 9-inch round cake pans. Bake for 30-35 minutes or until a toothpick inserted into the center comes out clean. Once baked, allow them to cool for about 10 minutes before transferring to wire racks to cool completely.
7. Frosting Preparation: In a medium bowl, beat the softened butter until creamy. Gradually add powdered sugar and cocoa powder. Mix well while drizzling in heavy cream and vanilla until you reach a smooth and spreadable consistency.
8. Layer and Frost: Once the cakes are completely cool, place one layer on a cake stand. Spread a generous amount of frosting over the first layer, place the second layer on top, and frost the top and sides of the cake, smoothing it out evenly.
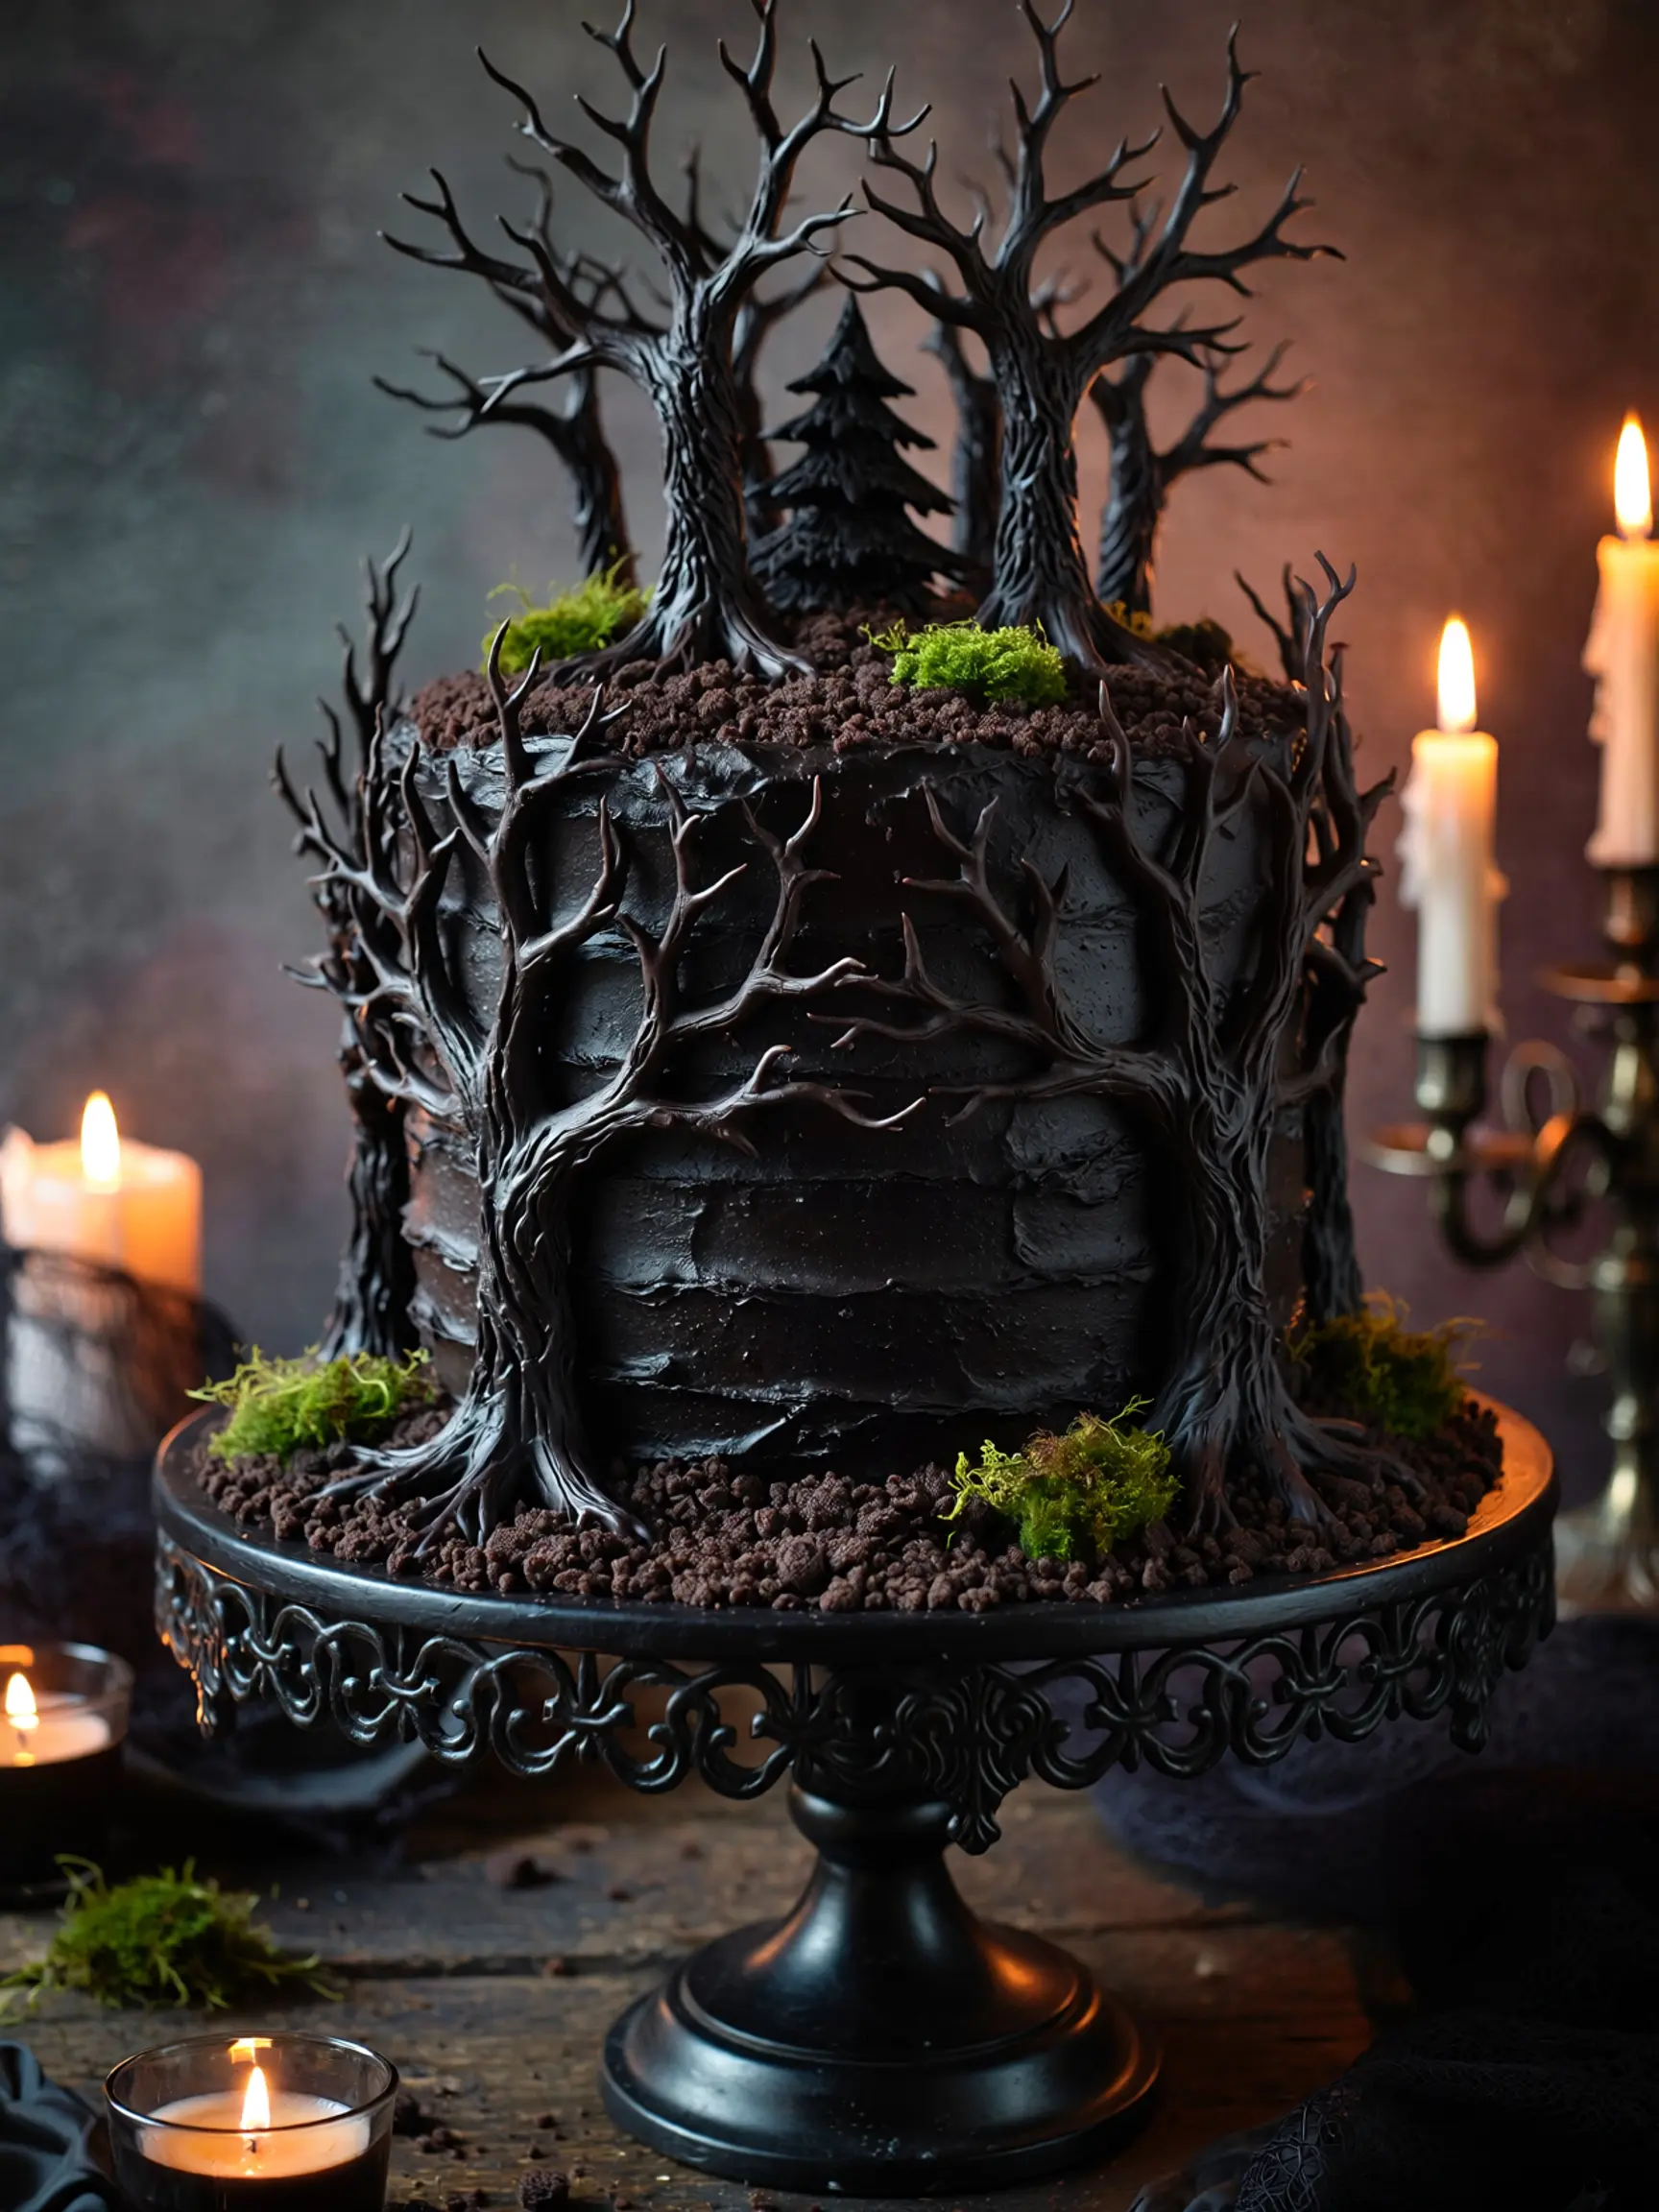
9. Creating the Haunted Forest Effect: Use black food coloring to tint some of the frosting for a more dramatic effect on the top. Sprinkle crushed chocolate cookies on top to create a “dirt” look.
10. Decorate with Creepy Treats: Add gummy worms, marzipan mushrooms, and any other spooky decorations you desire to finish your creation.
This Haunted Forest Cake will delight anyone who gets a slice, making it a perfect centerpiece for your Halloween festivities!
Nutritional Information
The following nutritional information applies to a single slice of the Haunted Forest Cake (assuming 12 slices per cake):
– Calories: Approximately 360
– Total Fat: 15g
– Saturated Fat: 8g
– Trans Fat: 0g
– Cholesterol: 50mg
– Sodium: 300mg
– Total Carbohydrates: 54g
– Dietary Fiber: 2g
– Sugars: 31g
– Protein: 5g
Remember, treating yourself to this Haunted Forest Cake during the Halloween season is all about indulgence and fun, so enjoy every bite without guilt!
Tips
Creating a stunning Haunted Forest Cake can be even more rewarding with these handy tips to elevate your baking experience:
– Use Quality Ingredients: The flavor and texture of your cake will significantly depend on the quality of your ingredients. Opt for high-quality cocoa powder and fresh eggs.
– Room Temperature Ingredients: Ensure your eggs and butter are at room temperature for a better emulsion, resulting in a lighter cake.
– Choosing Decorations: Get creative with the decorations; you could even use plastic spiders or spooky figures to amplify the haunted feel.
– Make Ahead: You can prepare the cake layers a day in advance. Wrap them tightly in plastic wrap and refrigerate until you are ready to frost and decorate.
Alternative Methods
If you want to adapt the Haunted Forest Cake to suit dietary restrictions or personal preferences, consider these alternative methods:
– Gluten-Free Option: Substitute all-purpose flour with a gluten-free baking blend to cater to gluten-sensitive individuals.
– Dairy-Free Version: Use almond milk or coconut milk in the batter and replace butter with a dairy-free alternative for the frosting.
– Reduced Sugar: For a healthier option, consider reducing sugar by using unsweetened applesauce or honey as a partial substitute.
Common Mistakes to Avoid
Even experienced bakers can make mistakes when creating a cake. Here are a few pitfalls to watch for:
– Overmixing the Batter: This can result in a dense cake. Mix until just combined.
– Not Watching Baking Time: Keep an eye on the cakes as they bake; all ovens vary, and overbaking can ruin the texture.
– Skipping Cooling Step: Ensure the cakes are completely cooled before frosting; otherwise, the frosting may melt.
Conclusion
Baking a Haunted Forest Cake this Halloween not only brings festive joy but also creates a sensational centerpiece for your celebrations. This guide provides you with everything you need, from the eerie decorations to the simple step-by-step instructions. The combination of moist chocolate cake, delightful frosting, and spooky decoration themes will create an unforgettable experience for both you and your guests. Don’t forget to share this creation as you gather around to enjoy your spooky treats! Return to my website for new recipes and continue immersing yourself in the joy of baking this Halloween season!
FAQs
Can I make this cake in advance?
Yes! The cake layers can be baked ahead of time and stored in the refrigerator for up to 2 days or frozen for up to 3 months. Just wrap them tightly to prevent drying out.
How can I make this cake less sweet?
You can reduce the amount of sugar in the recipe and balance the frosting with a pinch of salt to enhance the flavor without adding excess sweetness.
What other decorations can I use?
Feel free to customize your decorations. Chocolate spiders, ghostly meringues, or even edible glitter can add a creative twist to your Haunted Forest Cake.
Can I use different flavors?
Yes, you can swap out the chocolate for vanilla, red velvet, or any flavor you desire. Just adjust the cocoa powder and corresponding ingredients accordingly.
Is it okay to use fondant for decoration?
Absolutely! Fondant can offer a polished look to your cake but requires a little more skill to work with. Just ensure that it’s rolled out evenly for the best outcome.
By exploring these ideas and experimenting with the Haunted Forest Cake recipe, you can whip up something delectable and memorable for the Halloween season. Happy baking!
More Delicious Recipes

Haunted Forest Cake
Ingredients
Equipment
Method
- Preheat the oven to 350°F (175°C). Grease a 9×13-inch rectangular pan and two 5-inch round cake pans. Line the bottoms with parchment paper and lightly grease the parchment.
- In a bowl, whisk together the flour, cocoa powder, baking powder, baking soda, and salt.
- Using an electric mixer, beat the butter, granulated sugar, and brown sugar until light and fluffy, about 3 minutes. Beat in the vanilla.
- Add the eggs one at a time, mixing well after each addition.
- Reduce the mixer speed and gradually add the flour mixture in three additions, alternating with the buttermilk.
- Gradually add the cooled coffee and mix until the batter is smooth.
- Divide 1 1/2 cups of batter between each round cake pan. Spread the remaining batter into the rectangular pan.
- Bake the round cakes for 20 to 25 minutes and the rectangular cake for 35 to 40 minutes, or until a toothpick inserted into the center comes out clean.
- Let the cakes cool in the pans for 10 minutes, then transfer them to a wire rack to cool completely.
- For the buttercream, melt the chocolate in a microwave-safe bowl in short intervals, stirring until smooth. Let cool slightly.
- Beat the butter and confectioners’ sugar until light and fluffy. Add the vanilla and milk and mix well.
- Reserve about 1 cup of the frosting for decoration, then mix the melted chocolate into the remaining frosting.
- For the ganache, place the chocolate chips in a bowl. Heat the heavy cream until it is barely simmering, then pour it over the chocolate. Let stand for 5 minutes and stir until smooth.
- Let the ganache cool until it reaches a spreadable consistency.
- For the royal icing, beat the egg whites, vanilla, and lemon juice until foamy. Gradually add the confectioners’ sugar and beat until glossy and firm.
- Cut the two round cakes horizontally in half.
- Spread frosting between the cake layers and stack them together. Chill for about 15 minutes until firm.
- Frost the round cake with chocolate buttercream and refrigerate while preparing the rectangular cake.
- Place the rectangular cake on a serving platter and spread a thin layer of ganache over the top and sides. Chill until set.
- Spread the remaining ganache over the cake and chill for another 15 minutes.
- Place the round cake on top of the rectangular cake and decorate with the reserved frosting and royal icing to create a haunted forest design.
- Chill until ready to serve.
Notes
The ganache should be cool enough to spread but still soft.
Chill the cake between decorating stages to make assembly easier.
Store the finished cake covered in the refrigerator for up to 4 days.
Enjoying AmandBox? Follow us on Pinterest for more recipes.