
Neapolitan Cookies
Why Do Neapolitan Cookies Look So Impressive and Taste Like Childhood Nostalgia When Most Homemade Versions Turn Out Dry, Bland, or With Colors That Bleed Together?
Searches for “Neapolitan cookies recipe” spike whenever bakers want a fun, colorful treat that captures the magic of Neapolitan ice cream in cookie form. Yet many end up with cookies that spread too much, lose their distinct layers, or lack that perfect buttery vanilla-strawberry-chocolate balance. If you’ve ever struggled to create those beautiful tri-color slices, this comprehensive guide delivers a foolproof Neapolitan cookies recipe that produces tender, flavorful cookies with crisp edges and vibrant, distinct layers. These slice-and-bake cookies are as fun to make as they are to eat, making them perfect for holidays, parties, or everyday treats. With tested techniques, smart tips, and easy customizations, you’ll master bakery-style Neapolitan cookies that look stunning and taste even better.
Table of Contents
Ingredients List
This recipe makes about 40-48 cookies depending on thickness. Here’s exactly what you need for beautiful layers and rich flavor:
- 2 ½ cups (315g) all-purpose flour, spooned and leveled
- ½ teaspoon baking powder
- ½ teaspoon salt
- 1 cup (226g) unsalted butter, softened to room temperature
- 1 cup (200g) granulated sugar
- 1 large egg, at room temperature
- 1 ½ teaspoons pure vanilla extract
- 2 tablespoons unsweetened cocoa powder (for chocolate layer)
- 1 tablespoon strawberry milk powder or ½ teaspoon strawberry extract + 1-2 drops red or pink food coloring (for strawberry layer)
- Optional: ¼ teaspoon almond extract for extra depth in the vanilla layer
Substitutions for flexibility: Use gluten-free 1:1 flour blend for dietary needs, replace butter with vegan butter sticks, or use natural beet powder for coloring the strawberry layer instead of food coloring. These swaps keep the tender texture and fun tri-color appeal while adapting to your pantry.
Timing
Total time is about 3 hours including chilling, but active time is only 25-30 minutes. This is efficient for slice-and-bake cookies that deliver consistent results with minimal last-minute effort. Chilling the dough logs for at least 2 hours (or overnight) prevents spreading and keeps the layers sharp, making these cookies perfect for make-ahead baking.
Step 1: Mix the Base Dough
In a medium bowl, whisk together the flour, baking powder, and salt. In a large bowl, beat the softened butter and sugar with an electric mixer on medium speed until light and fluffy, about 2-3 minutes. Add the egg and vanilla extract, beating until fully combined and creamy. This creaming process creates air pockets for tender cookies. Gradually mix the dry ingredients into the wet until just combined—do not overmix to keep the dough soft and easy to divide.
Step 2: Divide and Flavor the Dough
Divide the dough into three equal portions (about 280-300g each). Leave one portion plain (or add almond extract) for the vanilla layer. To the second portion, mix in the cocoa powder until evenly colored and flavored for the chocolate layer. For the strawberry portion, mix in the strawberry milk powder (or extract + food coloring) until the color is vibrant and uniform. Knead each portion gently by hand if needed for even distribution. The doughs should be soft but not sticky.
Step 3: Shape the Logs
Roll each flavored dough into a rough 8×4-inch rectangle on parchment paper. Stack them carefully in your desired order (traditional is strawberry, vanilla, chocolate). Press the layers gently together to adhere without squishing. Trim the edges for clean lines, then roll the stacked rectangle into a tight log about 2 inches in diameter. Wrap tightly in plastic wrap and twist the ends. Repeat if making multiple logs. Chill in the refrigerator for at least 2 hours or up to 3 days for clean slices and minimal spreading.
Step 4: Slice and Bake
Preheat your oven to 350°F (175°C) and line baking sheets with parchment paper. Remove the dough log from the fridge and slice into ¼-inch thick rounds using a sharp knife. Place slices 2 inches apart on the sheets. Bake for 9-12 minutes until the edges are just set and very lightly golden. The centers should still look slightly soft. Rotate the pan halfway through for even baking. Cool on the sheet for 5 minutes before transferring to a wire rack.
Step 5: Cool and Store
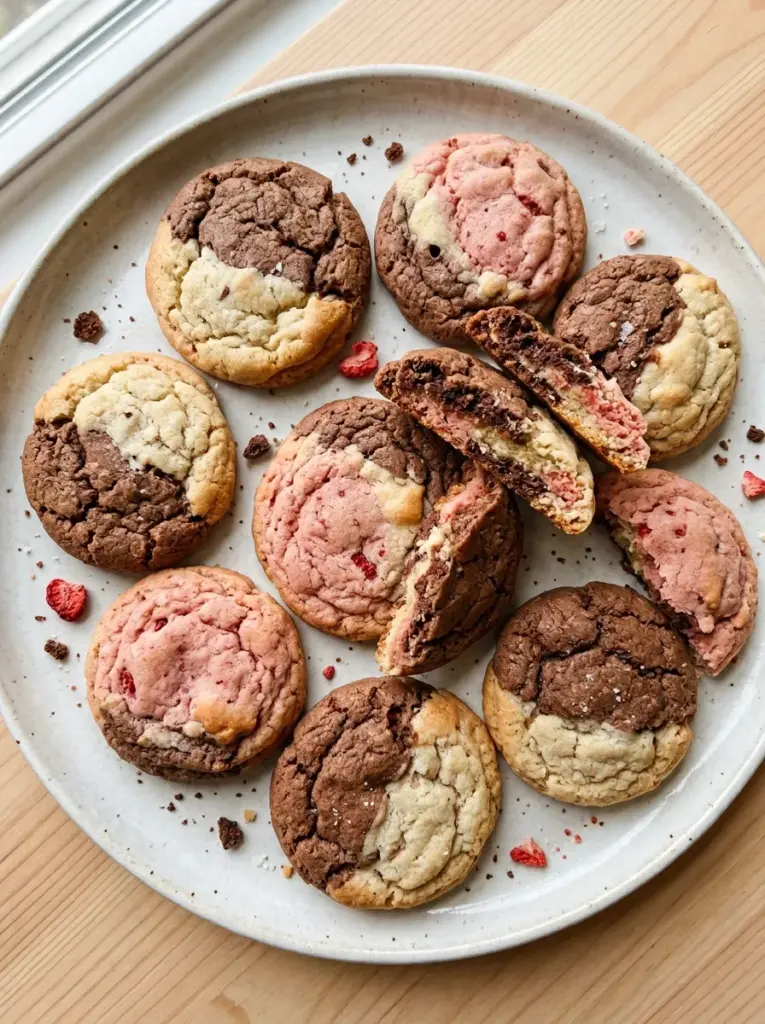
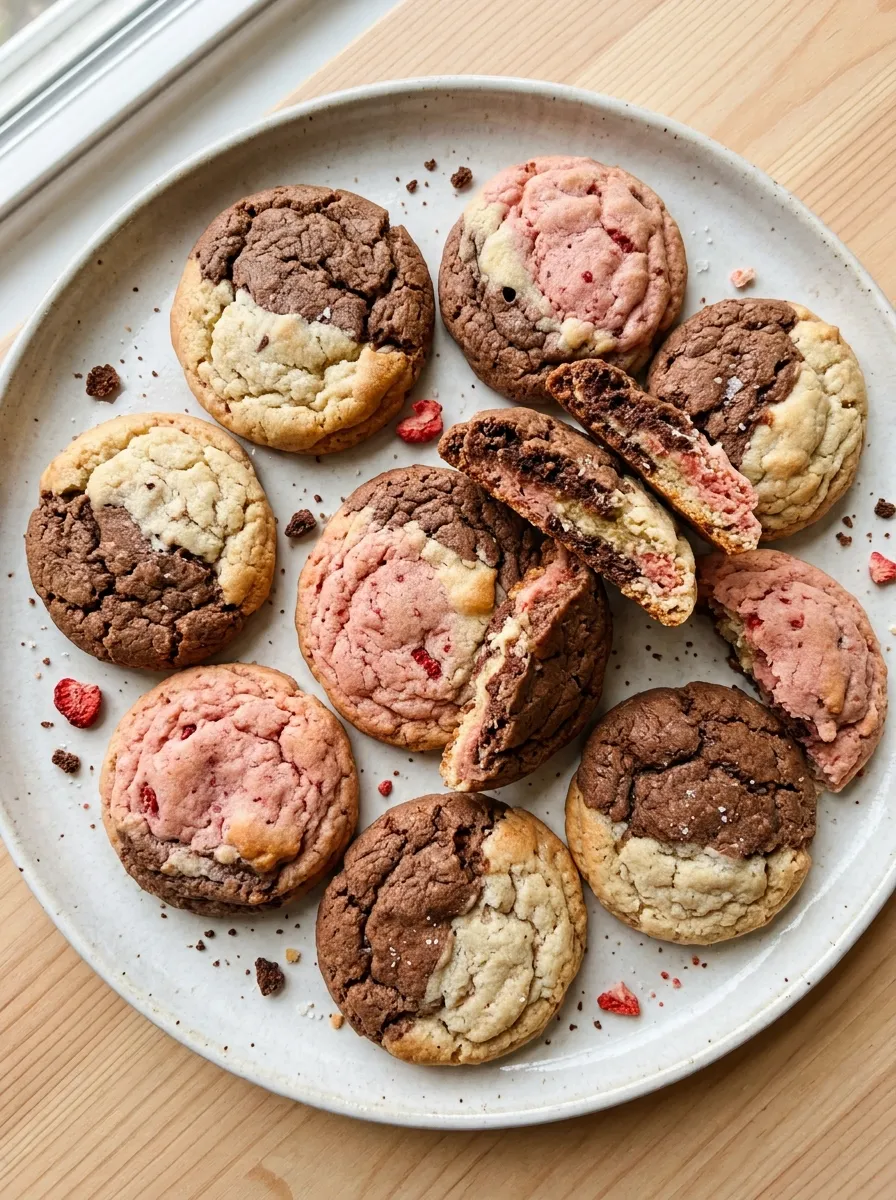
Allow the Neapolitan cookies to cool completely on the wire rack. The layers will firm up as they cool, revealing beautiful distinct stripes. Enjoy once cooled or store for later.
Nutritional Information
Per cookie (based on 48 cookies): approximately 70-80 calories, 4g fat, 9g carbohydrates, 1g protein, and minimal fiber. These cookies offer a fun way to enjoy buttery shortbread-style treats. The strawberry and chocolate variations add small amounts of antioxidants from cocoa and natural fruit elements. Homemade versions contain far less additives and sugar than store-bought packaged cookies. Values vary based on exact slice thickness and substitutions—use a nutrition calculator for precision.
Healthier Alternatives for Neapolitan Cookies
Create lighter or more nutritious versions with simple changes. Use white whole wheat flour or a 50/50 blend for added fiber. Reduce sugar by ¼ cup and rely on the natural sweetness from strawberry powder. For lower-fat, replace half the butter with Greek yogurt or applesauce while maintaining tenderness. Vegan adaptation works well with plant-based butter and a flax egg. Add chopped freeze-dried strawberries to the pink layer or mini chocolate chips to the chocolate dough for extra flavor and texture. These modifications keep the fun tri-color look while supporting gluten-free, lower-sugar, or plant-based dietary needs.
Serving Suggestions
Serve Neapolitan cookies on a colorful platter for parties or cookie exchanges where their beautiful layers steal the show. Pair with cold milk, strawberry milkshakes, or coffee for the ultimate nostalgic treat. Create ice cream sandwiches by placing vanilla ice cream between two cookies. Personal tip: Crush leftover cookies and use as a crunchy topping for cheesecake or yogurt parfaits. They make excellent holiday gifts when packaged in clear bags with ribbon and pair wonderfully with hot chocolate or fruit teas.
Common Mistakes to Avoid
Not chilling the dough long enough causes spreading and blurred layers—minimum 2 hours is essential. Overmixing any colored portion can make the dough tough. Using warm butter leads to greasy cookies that don’t hold shape. Slicing too thick or thin affects baking time and texture. Inaccurate oven temperature causes uneven browning. Baker feedback shows these errors cause most disappointing results. Use room-temperature ingredients only where specified, chill thoroughly, and watch the bake time closely for perfect tri-color cookies every batch.
Storing Tips for Neapolitan Cookies
Store cooled Neapolitan cookies in an airtight container at room temperature for up to 1 week. They stay fresh and maintain their vibrant colors beautifully. For longer storage, freeze the unbaked dough logs wrapped tightly for up to 3 months. Thaw overnight in the refrigerator before slicing and baking. Baked cookies can also be frozen in freezer-safe bags for up to 2 months. Place parchment between layers to prevent sticking. These methods preserve texture, flavor, and the eye-catching appearance.
Conclusion
This Neapolitan cookies recipe proves that with simple division and flavoring techniques, proper chilling, and straightforward baking, you can create stunning tri-color cookies that taste as good as they look. From quick active prep and beautiful presentation to versatile customizations and reliable storage, these cookies are a delightful addition to any baker’s repertoire. The foolproof methods turn potential layer issues into consistent, crowd-pleasing success. Bake a batch today, experiment with your favorite flavor twists, and share your results in the comments below. Will you stick with classic strawberry-vanilla-chocolate or try new combinations? Explore more fun cookie recipes and slice-and-bake treats on the site for endless baking inspiration. Happy baking and enjoy every colorful, buttery bite!
FAQs
Why do my layers blend together?
Insufficient chilling or overly soft dough causes bleeding. Chill the stacked log thoroughly and use a sharp knife for clean cuts.
Can I make these cookies gluten-free?
Yes—use a high-quality 1:1 gluten-free flour blend. The results are excellent with minimal adjustments.
How do I get brighter strawberry color naturally?
Use freeze-dried strawberry powder instead of extract or food coloring for vibrant pink without artificial dyes.
Can I freeze the dough logs?
Absolutely. Wrap tightly and freeze for up to 3 months. Slice straight from the freezer, adding 1-2 extra minutes to bake time.
How thick should I slice the cookies?
¼-inch is ideal for balanced baking and distinct layers. Thicker slices may need a couple extra minutes in the oven.
More Dessert Recipes to Try

Neapolitan Cookies
Ingredients
Equipment
Method
- In a large bowl, beat the softened butter and sugar until light and fluffy.
- Add the egg and vanilla extract and mix until well combined.
- In a separate bowl, whisk together the flour, baking powder, and salt.
- Gradually add the dry ingredients to the butter mixture and mix until a soft dough forms.
- Divide the dough evenly into three portions.
- Leave one portion plain for the vanilla layer.
- Mix the cocoa powder into the second portion until evenly incorporated.
- Mix the strawberry powder into the third portion. Add a small amount of pink food coloring if desired.
- Line a loaf pan with parchment paper, leaving some overhang on the sides.
- Press the vanilla dough evenly into the bottom of the pan.
- Add the chocolate dough as the second layer and press gently to create an even surface.
- Add the strawberry dough as the final layer and smooth the top.
- Cover and refrigerate for at least 1 hour, until firm.
- Preheat the oven to 350°F (175°C).
- Remove the chilled dough from the pan and slice it into thin cookies.
- Place the slices on parchment-lined baking sheets, leaving space between each cookie.
- Bake for 10 to 12 minutes, until the edges are lightly golden.
- Let the cookies cool on the baking sheet for 5 minutes.
- Transfer them to a wire rack to cool completely.
Notes
Use a sharp knife and make clean cuts for well-defined layers.
Freeze-dried strawberry powder provides stronger strawberry flavor without adding excess moisture.
Food coloring is optional and only adds visual color.
Do not overbake the cookies or the edges may become too crisp.
Store cooled cookies in an airtight container at room temperature for up to 5 days.
The layered dough can be frozen for up to 2 months before baking.
Enjoying AmandBox? Follow us on Pinterest for more recipes.