
Sprinkle Birthday Cake
Here is a fact that will not surprise anyone who has ever stood in front of a birthday cake: according to a 2023 consumer survey conducted by the American Bakers Association, vanilla birthday cake with sprinkles remains the single most requested birthday cake flavor and style across every age group in the United States — from children turning five to adults turning fifty. It has held that position for over two decades, through every dessert trend that has come and gone.
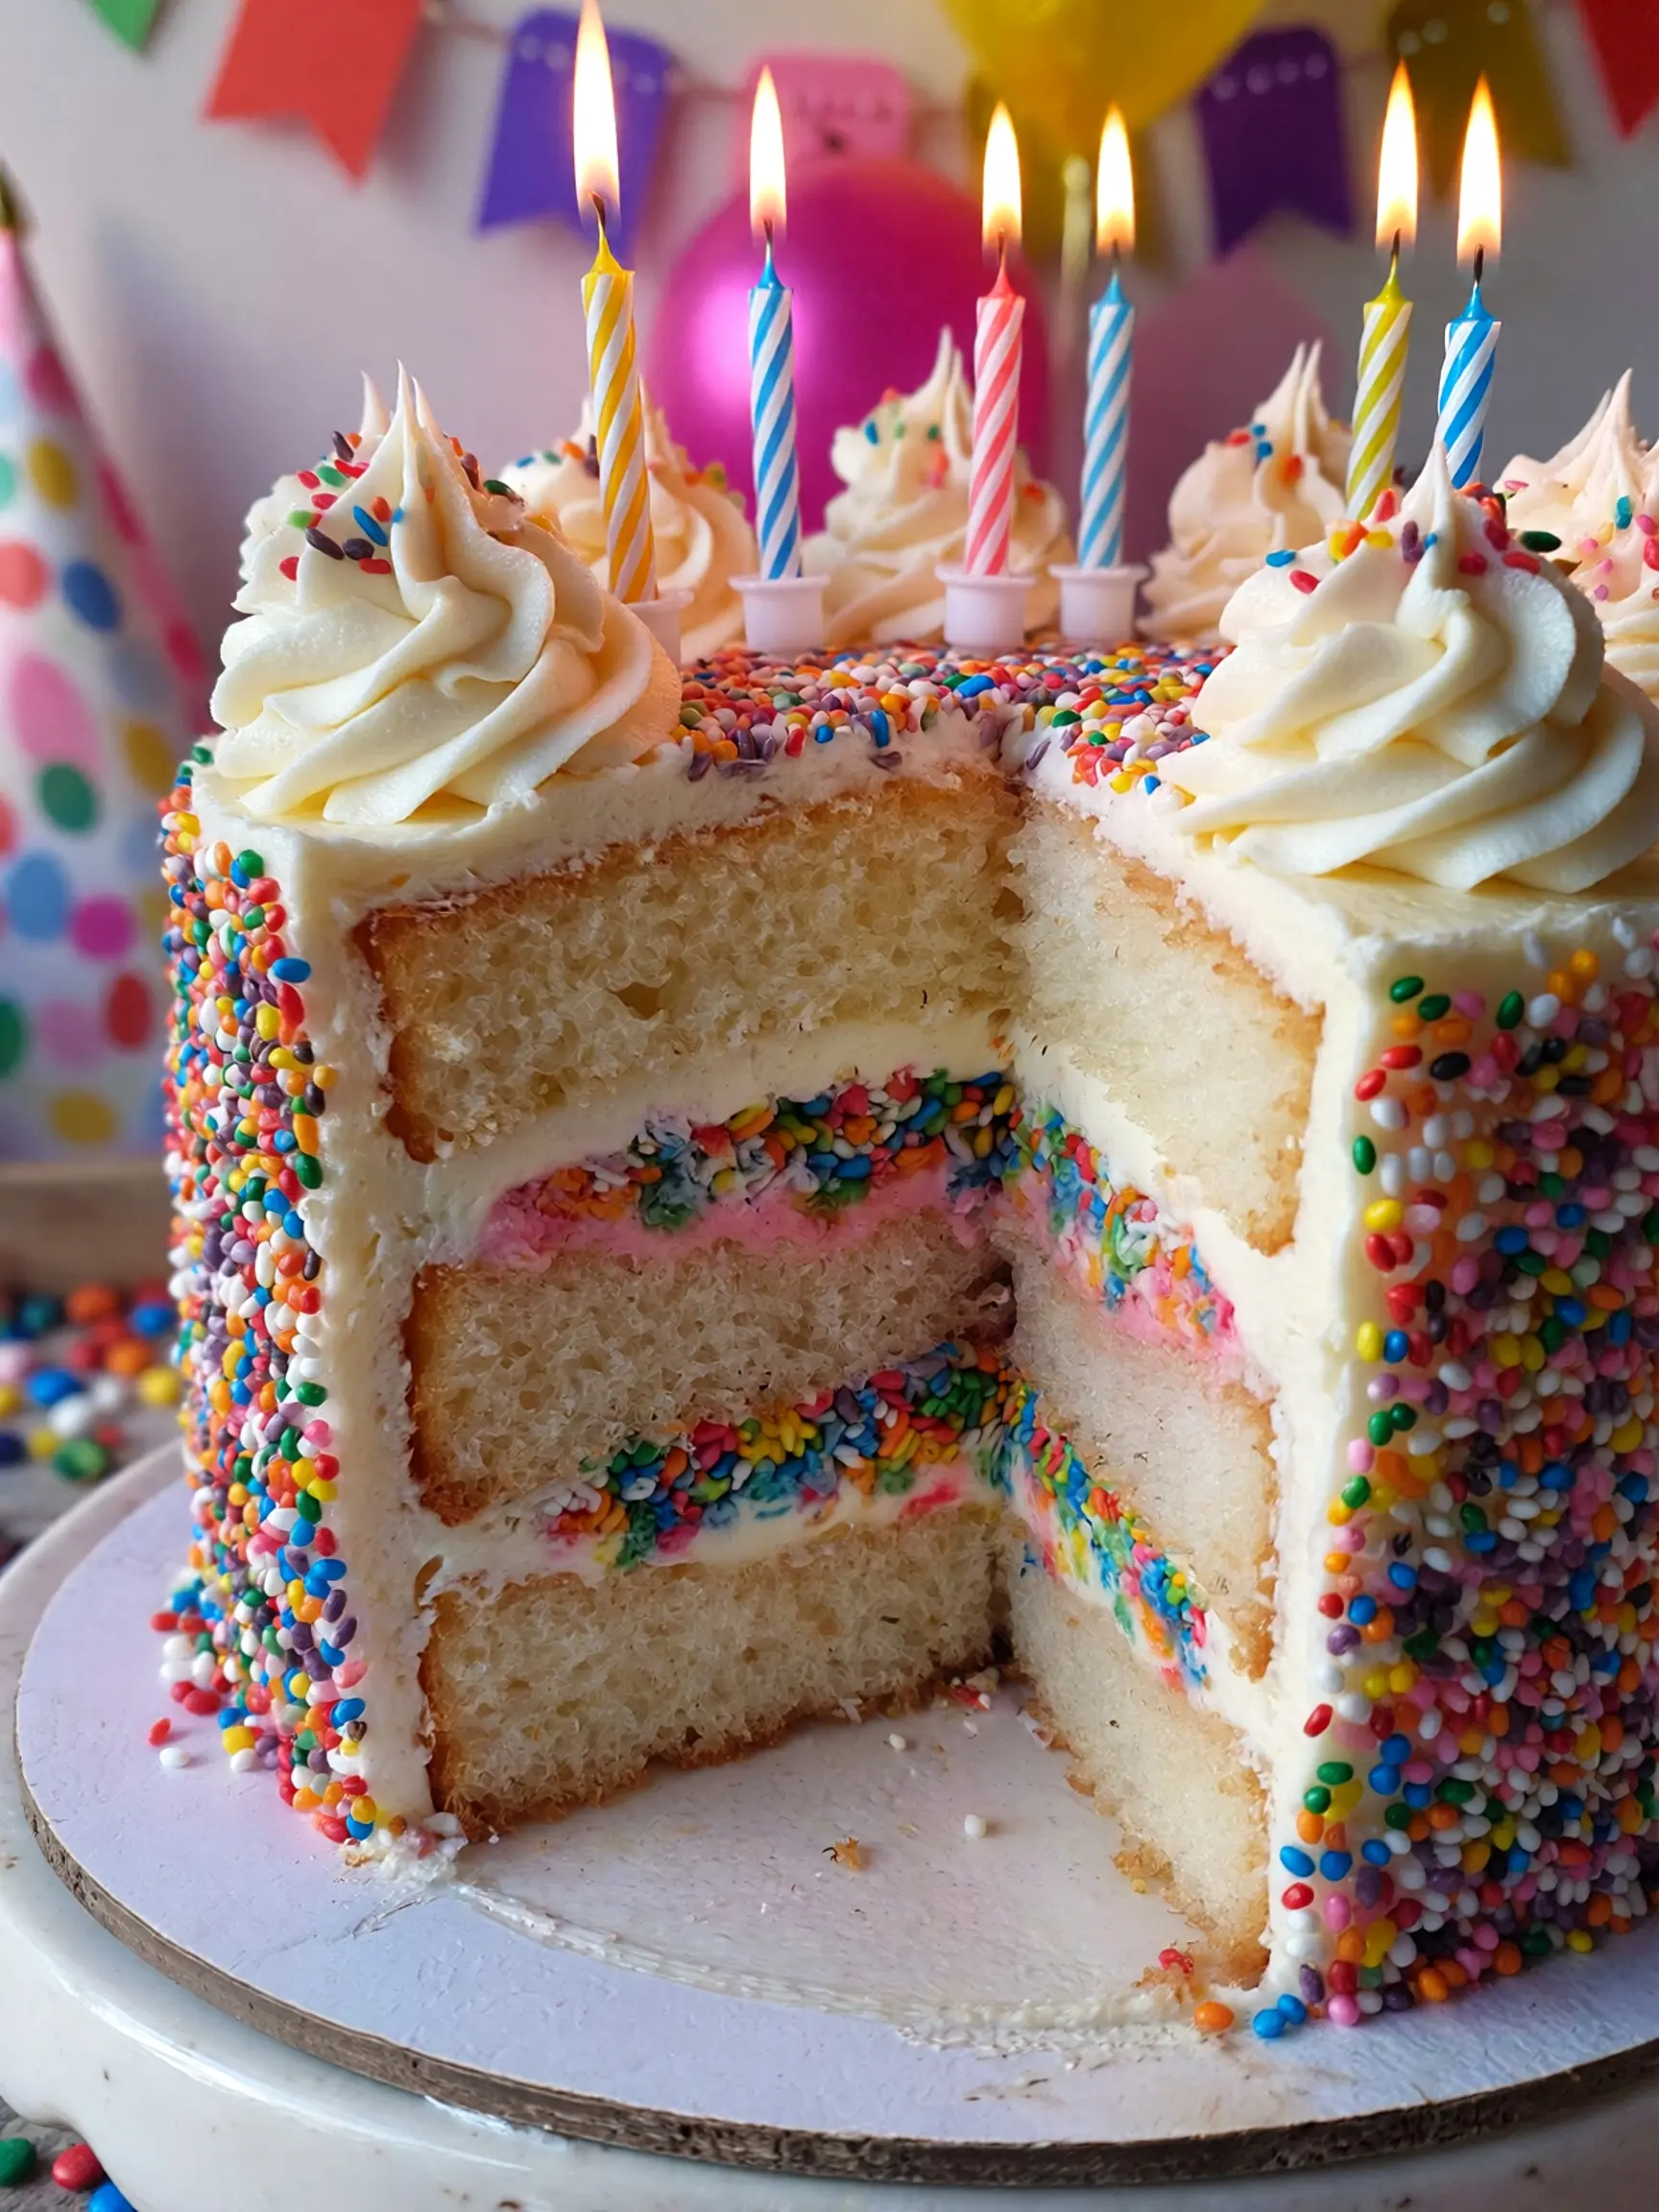
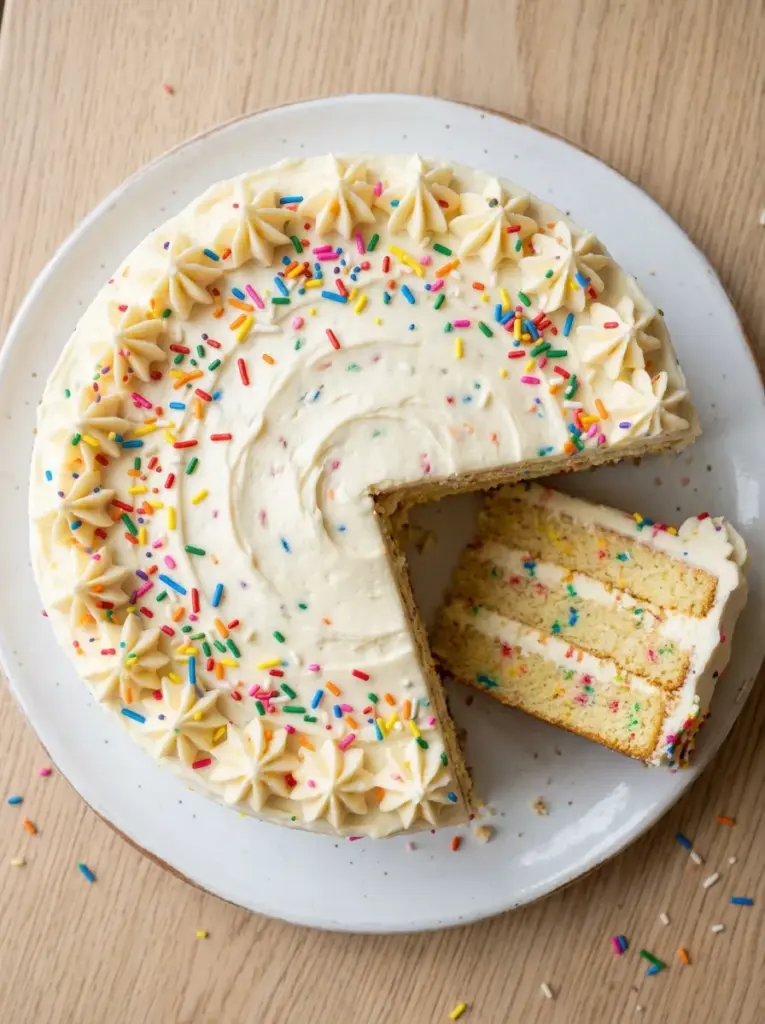
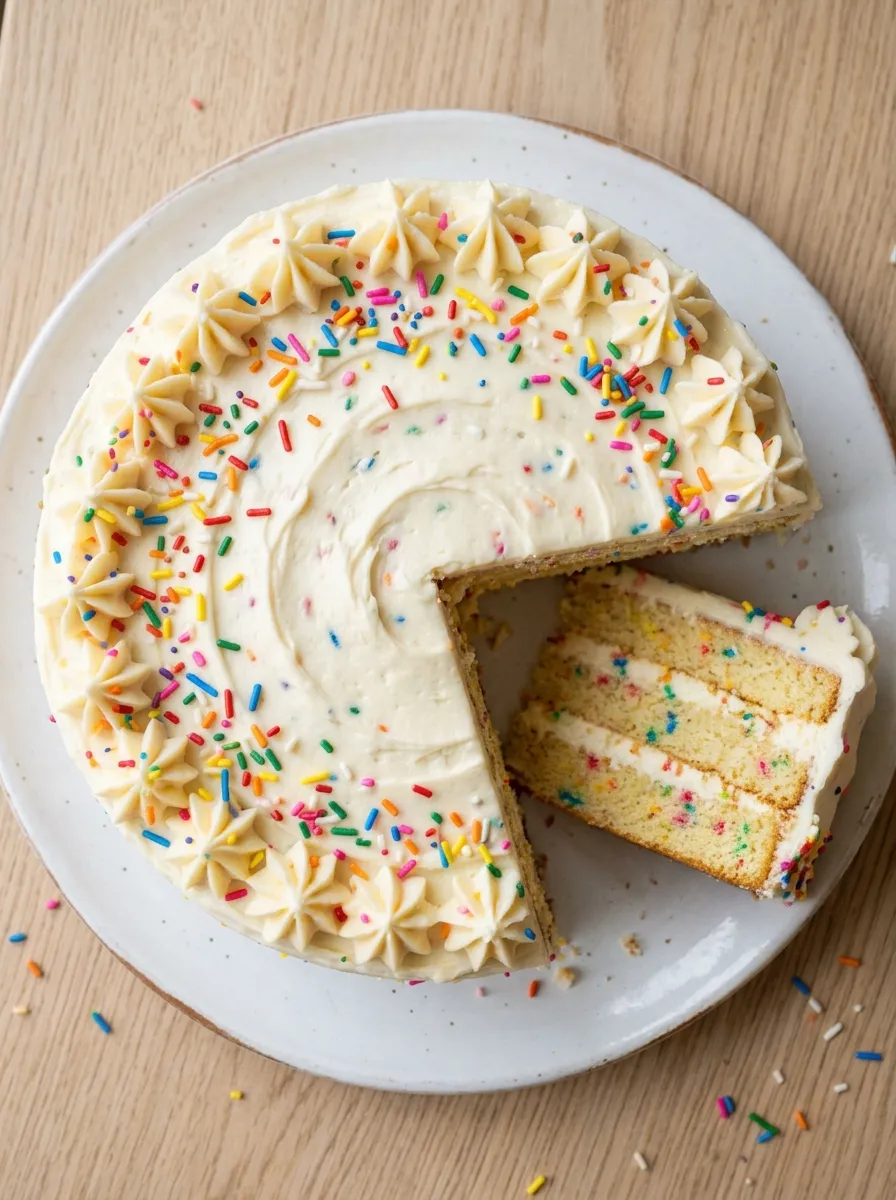
The reason is not nostalgia alone, though nostalgia plays a powerful role. The reason is that a great sprinkle birthday cake — one with a genuinely moist, tender vanilla crumb flecked with rainbow sprinkles throughout, frosted with a cloud of fluffy vanilla buttercream, and covered in a joyful cascade of colorful jimmies — is an objectively delicious, texturally satisfying, visually exhilarating thing. It is the cake that makes people smile before they even take a bite.
What most home bakers do not realize is that the difference between a dry, dense, forgettable birthday cake and one that earns gasps and recipe requests comes down to a handful of specific techniques — the right fat ratio, the right mixing method, the right type of sprinkles for the batter, and a buttercream that is genuinely fluffy rather than dense and sugary. This guide covers every single one of those details, so the sprinkle birthday cake you make at home is not just as good as a bakery version — it is better.
Table of Contents
Ingredients
This recipe builds a three-layer 8-inch funfetti-style sprinkle cake with a classic American vanilla buttercream. Every component is detailed below for clarity and ease of execution. The quantities serve 16–20 generously.
For the Sprinkle Vanilla Cake Layers (makes three 8-inch layers):
- 3 cups (360g) all-purpose flour, spooned and leveled — never scooped directly from the bag
- 1 tablespoon baking powder
- ½ teaspoon fine sea salt
- 1 cup (225g) unsalted butter, at room temperature
- 1¾ cups (350g) granulated sugar
- 4 large egg whites plus 1 whole egg, at room temperature (egg whites produce a whiter, more tender crumb)
- 1 tablespoon pure vanilla extract
- 1 teaspoon almond extract (the secret ingredient in every great funfetti cake — it adds a warm, bakery-style depth that vanilla alone cannot replicate)
- 1½ cups (360ml) whole buttermilk, at room temperature
- ½ cup (80g) rainbow jimmies sprinkles — not nonpareils (the tiny round balls bleed color into the batter and turn it grey-green; jimmies hold their color)
For the Vanilla American Buttercream:
- 1½ cups (340g) unsalted butter, at room temperature
- 5½ cups (660g) powdered sugar, sifted
- ¼ cup (60ml) heavy cream, plus more as needed
- 2 teaspoons pure vanilla extract
- ½ teaspoon almond extract
- ¼ teaspoon fine sea salt
- Rainbow jimmies for decorating the exterior
For the Optional Vanilla Simple Syrup (highly recommended):
- ½ cup (100g) granulated sugar
- ½ cup (120ml) water
- 1 teaspoon pure vanilla extract
For Decoration:
- 1–2 cups rainbow jimmies for pressing onto the exterior sides and top
- Colorful birthday candles
- Rainbow sprinkle clusters or confetti sprinkles for the top
- White chocolate or vanilla candy melts for drip decoration (optional)
- Edible gold stars or silver sugar pearls for an elevated finish
Smart Substitutions: No buttermilk on hand? Combine 1½ cups of whole milk with 1½ tablespoons of white vinegar or lemon juice, stir, and let sit for 5 minutes — it creates a perfect buttermilk substitute. Prefer oil over butter in the cake for extra moisture? Replace the butter with 1 cup of neutral vegetable oil — the cake will be slightly denser but noticeably more moist and will stay tender longer. Allergic to nuts or prefer to skip almond extract? Double the vanilla extract instead — the cake will be wonderful, just slightly less complex. For a dairy-free version, use plant-based butter in the cake and frosting, oat milk plus vinegar as the buttermilk substitute, and plant-based heavy cream.
Timing
A three-layer sprinkle birthday cake is a weekend project that rewards planning. Here is the realistic timeline broken across two days for the best possible result:
- Day One — Bake Cake Layers: 25 minutes prep + 30–32 minutes baking = approximately 1 hour 45 minutes including cooling
- Day One — Make Simple Syrup: 10 minutes
- Day Two — Make Buttercream: 20 minutes
- Day Two — Level, Fill, Crumb Coat, and Chill: 30 minutes + 30 minutes refrigeration
- Day Two — Final Frost, Decorate, and Apply Sprinkles: 30–40 minutes
- Total Active Time: Approximately 3 hours across two days
- Servings: 16–20 slices
- Difficulty Level: Easy to Intermediate
Pro Timing Tip: The single best thing you can do for this cake is bake the layers the day before and refrigerate them overnight, tightly wrapped in plastic wrap. Cold cake layers are dramatically easier to level, fill, and frost than freshly baked ones. They are firmer, less crumbly, and far more forgiving when you run a spatula across them. Many professional bakeries routinely refrigerate cake layers for 24–48 hours before decorating for precisely this reason.
Step 1: Prepare and Bake the Cake Layers
Preheat the oven to 350°F (175°C). Grease three 8-inch round cake pans generously with butter or baking spray, line the bottoms with parchment paper circles, and grease the parchment. In a medium bowl, whisk together the flour, baking powder, and salt until completely combined and uniform. Set aside.
In the bowl of a stand mixer fitted with the paddle attachment, beat the room-temperature butter and granulated sugar on medium-high speed for a full 5 minutes. Set a timer and do not cut this short. Proper creaming — beating until the mixture is pale, significantly increased in volume, and genuinely fluffy — is the single most important structural step in the entire recipe. It incorporates air into the fat and sugar that gives the cake its light, tender crumb. The mixture should look almost white and feel noticeably light when you stop the mixer and rub a bit between your fingers.
Add the egg whites and whole egg one at a time, beating for 20 seconds after each addition. Scrape down the bowl and beater. Add both extracts and mix to combine. Add the flour mixture in three additions, alternating with the buttermilk in two additions, beginning and ending with the flour. Mix on the lowest speed setting until just barely combined after each addition — a few streaks of flour are fine. Overmixing at this stage develops gluten and turns a tender cake tough and rubbery.
Remove the bowl from the mixer. Add the rainbow jimmies and fold them in gently by hand using a flexible spatula — just 8 to 10 folds, no more. Folding by hand prevents the mixer from breaking the sprinkles and smearing their color into the batter. Divide the batter evenly among the three prepared pans — a kitchen scale ensures precision at approximately 540g per pan. Bake for 30–32 minutes until the tops are lightly golden, the cakes have pulled slightly away from the sides of the pans, and a toothpick inserted into the center comes out clean or with a few moist crumbs. Cool in the pans for 15 minutes before turning out onto wire racks to cool completely.
Step 2: Make the Vanilla Simple Syrup
Combine the sugar and water in a small saucepan over medium heat and stir until the sugar is completely dissolved. Remove from heat, stir in the vanilla extract, and let cool to room temperature. Transfer to a small squeeze bottle or jar.
Simple syrup is the professional baker’s insurance policy against dry cake. Brushed generously over each cake layer before frosting, it adds moisture, extends the cake’s shelf life, and introduces an additional layer of vanilla flavor throughout the crumb. It is an invisible technique that makes a perceptible difference in the final eating quality of every slice — especially for a cake that will be assembled the day before serving.
Step 3: Make the Vanilla American Buttercream
In the bowl of a stand mixer fitted with the paddle attachment, beat the room-temperature butter on medium-high speed for a full 4–5 minutes until it is pale, dramatically increased in volume, and whipped to a genuinely fluffy consistency. This extended butter-whipping step is what separates a light, cloud-like American buttercream from a dense, greasy one. Do not rush it.
Reduce the mixer speed to low and add the sifted powdered sugar one cup at a time, mixing until incorporated before adding the next cup. Adding all the sugar at once creates a blizzard of powdered sugar and produces a lumpy, uneven buttercream. Once all the sugar is added, add the vanilla extract, almond extract, salt, and 3 tablespoons of the heavy cream. Increase the speed to medium-high and beat for 3–4 full minutes until the buttercream is brilliantly white, extremely fluffy, and completely smooth. Add additional cream one tablespoon at a time if needed to reach a spreadable consistency. The finished buttercream should hold a stiff peak but spread easily without tearing the cake surface.
Step 4: Level, Brush with Syrup, and Fill
Using a long serrated knife or a cake leveler, trim the domed top from each cake layer to create a perfectly flat surface. Place a small amount of buttercream on your cake board or serving plate and press the first layer onto it firmly — this anchors the cake and prevents sliding during frosting. Brush the cut surface generously with the vanilla simple syrup and allow it to absorb for 1–2 minutes.
Spread approximately ¾ cup of buttercream evenly over the first layer, taking it all the way to the edges. Place the second layer on top, pressing gently to ensure full contact. Brush with syrup and apply buttercream. Add the third and final layer, pressing gently, then brush the top with syrup. A perfectly assembled layer cake has even, consistent buttercream between every layer — use a ruler or a toothpick to check that the layers are level before proceeding.
Step 5: Apply the Crumb Coat and Chill
Apply a thin, even layer of buttercream over the entire outside of the cake — the sides and the top. This crumb coat does not need to be pretty. It needs to be thorough, covering every surface completely and trapping all loose crumbs inside the thin buttercream layer so they cannot appear in the final frosting. Use an offset spatula to spread the crumb coat and a bench scraper to smooth the sides roughly. Refrigerate uncovered for 30 minutes until the crumb coat is completely firm and cold to the touch.
Step 6: Final Frost and Smooth
Remove the chilled, crumb-coated cake from the refrigerator. Apply a generous final layer of buttercream to the top and sides using an offset spatula. For a smooth finish, hold a bench scraper vertically against the side of the cake and rotate the turntable in one slow, continuous motion, removing excess buttercream and leaving a perfectly smooth surface. For the top, use the offset spatula in long, sweeping strokes from the edges inward. For a textured, more casual finish — which works beautifully for a fun, celebratory sprinkle cake — use the back of a spoon to create soft swirls across the sides and top. Both approaches look wonderful; the choice is entirely personal.
Step 7: Apply the Sprinkles
This is the most joyful step in the entire recipe and also the one that requires the most patience. Work over a rimmed baking sheet to catch falling sprinkles — they will fall, abundantly. Hold the cake on its board with one hand tilted slightly over the catching tray. Using your other hand, scoop a small handful of rainbow jimmies and gently press them into the lower third of the cake’s side. Rotate the cake slightly and repeat, working your way around and up the sides until the coverage level you want is achieved.
For a fully sprinkle-coated cake, work in small sections and press firmly enough that the sprinkles embed into the buttercream surface without dislodging when you move your hand away. For a half-coated look — sprinkles on the lower half only — mark a visual line at the halfway point and work below it only. Scatter a generous handful of sprinkles over the top of the cake, pressing gently in the center and allowing them to fall more naturally at the edges. Collect the fallen sprinkles from the catching tray and reuse them — nothing is wasted.
Step 8: Final Touches and Candles
Place the decorated cake on a beautiful cake stand or board. Add colorful birthday candles in a pattern of your choice — a cluster in the center, a line across the top, or arranged in the shape of the birthday person’s age or initial. Add any final decorative elements — edible gold stars pressed gently into the buttercream surface, a ring of confetti sprinkles around the base of the candles, or a small arrangement of sugar flowers at one side of the top for an elevated touch. Refrigerate the finished cake until 45 minutes before serving to allow the buttercream to come to the perfect eating temperature — slightly softened, creamy, and yielding.
Nutritional Information
Based on one slice (one sixteenth of the full three-layer cake, including cake layers, buttercream, and sprinkles):
| Nutrient | Amount Per Serving |
|---|---|
| Calories | ~580 kcal |
| Protein | 5g |
| Total Fat | 28g |
| Saturated Fat | 17g |
| Carbohydrates | 78g |
| Fiber | 0.5g |
| Sugars | 58g |
| Sodium | 195mg |
| Calcium | 75mg |
| Iron | 1.1mg |
| Vitamin A | 520 IU |
Nutritional Context: This is a birthday cake — it exists to celebrate, delight, and create memories. The butter and eggs provide fat-soluble vitamins A, D, E, and K, and the dairy contributes calcium. Serve in generous, celebratory slices and enjoy every single bite without reservation. Life is genuinely too short for small pieces of birthday cake.
Healthier Alternatives for the Recipe
Even a celebration cake can accommodate thoughtful modifications for guests with specific dietary needs.
Reduce the Sugar: Decrease the granulated sugar in the cake batter from 1¾ cups to 1½ cups — the cake will still be perfectly sweet, especially with the vanilla and almond extracts providing aromatic sweetness. In the buttercream, reduce the powdered sugar by 1 cup and compensate with an extra tablespoon of heavy cream for spreadability — it will be noticeably less sweet and more buttery.
Increase the Protein: Replace 2 tablespoons of the all-purpose flour with an equal weight of unflavored whey protein powder. The texture difference is minimal at this substitution level and each slice gains approximately 2 additional grams of protein — modest but meaningful for a cake served to active individuals or athletes.
Oil-Based Cake for Better Nutrition: Replace the butter in the cake batter with ¾ cup of extra-virgin olive oil or avocado oil. The monounsaturated fats in these oils are nutritionally superior to butter, and the resulting cake is noticeably more moist and tender. The flavor is slightly less rich but completely delicious.
Gluten-Free Version: Replace the all-purpose flour with a 1:1 gluten-free baking flour blend — King Arthur Measure for Measure and Bob’s Red Mill 1-to-1 both work reliably here. The texture is slightly denser but entirely acceptable for a celebratory cake context. Ensure the sprinkles you use are certified gluten-free, as some sprinkle brands contain trace wheat starch.
Lower-Sugar Frosting Option: Replace the American buttercream with a whipped cream frosting made from 2 cups of heavy cream whipped with ¼ cup of powdered sugar and 1 teaspoon of vanilla. It is dramatically lighter and less sweet than buttercream, pipes beautifully, and pairs wonderfully with the sweet cake layers. Note that whipped cream frosting requires refrigeration and is less stable at room temperature than buttercream.
Serving Suggestions
A sprinkle birthday cake is inherently festive and celebratory — these serving ideas amplify that joy to its fullest.
The Classic Birthday Moment: Bring the candle-lit cake to the table in a darkened room while everyone sings. Allow the birthday person to make a wish and blow out the candles before anyone cuts — this ritual is the emotional heart of the birthday cake tradition and should never be rushed or skipped for the sake of getting to dessert faster.
With Vanilla Bean Ice Cream: A scoop of high-quality vanilla bean ice cream alongside a slice of sprinkle birthday cake is one of the great simple pleasures of the dessert world. The cold, creamy ice cream contrasts with the tender cake and fluffy buttercream in a way that elevates every forkful. Add a drizzle of warm caramel sauce for an extra layer of indulgence.
Dessert Table Centerpiece: Position the sprinkle cake at the center of a dessert table surrounded by coordinating sweets — rainbow sprinkle cookies, confetti cupcakes, sprinkle-dipped pretzel rods, and a candy bar in matching colors. The visual cohesion of a sprinkle-themed dessert spread is genuinely impressive and creates a memorable party environment.
Individual Mini Cakes: Bake the batter in 4-inch mini cake pans to create individual birthday cakes for each guest — each person gets their own fully decorated mini cake with a personal candle. This presentation is particularly memorable for children’s birthday parties and feels extraordinarily special and personal.
Cake and Milk Bar: For a children’s party, set up a “cake and milk” bar — slices of sprinkle cake with individual bottles or glasses of whole milk, chocolate milk, and strawberry milk. The combination of birthday cake and cold milk is one of the most universally beloved food pairings in childhood and will make the party genuinely unforgettable.
Cake for Breakfast the Next Day: This is not a suggestion — it is a tradition. Cold birthday cake from the refrigerator the morning after the party, eaten with a cup of coffee or a glass of milk, is one of the quiet pleasures of birthday celebrations that deserves acknowledgment and active encouragement.
Common Mistakes to Avoid
These are the most frequent errors that prevent a sprinkle birthday cake from reaching its joyful potential.
Using nonpareils in the batter instead of jimmies: Nonpareils — the tiny round sprinkles — bleed their color immediately upon contact with wet batter and produce a grey-green, unappetizing tinge in the finished crumb rather than the bright, defined flecks of color that make funfetti cake visually magical. Always use jimmy-style sprinkles for the batter. Nonpareils are beautiful as exterior decoration only.
Not creaming the butter and sugar long enough: Five minutes feels like a long time when you are standing at a mixer, but it is the difference between a dense, heavy cake and one with the light, tender crumb that makes people ask for a second slice. Set a timer and resist the urge to move on early.
Overmixing after adding the flour: Once the flour goes in, the goal is minimum mixing — just enough to combine the ingredients. Every additional second of mixing beyond what is necessary develops more gluten and makes the crumb progressively tougher. Mix on the lowest speed and stop the moment the flour is no longer visible.
Skipping the simple syrup: Cake layers baked in advance and refrigerated overnight lose meaningful moisture. Simple syrup replaces that moisture and adds a dimension of vanilla flavor that makes every slice taste more intentional and considered. It takes 10 minutes to make and makes a perceptible difference.
Adding too many sprinkles to the batter: More does not mean more joyful in this specific case. More than ½ cup of jimmies in the batter weighs it down, can interfere with the cake’s rise, and makes slicing difficult as the dense sprinkle clusters resist a clean cut. Half a cup is the sweet spot — enough for a genuinely colorful crumb without structural compromise.
Frosting a warm cake: Warm cake layers melt buttercream instantly, causing it to slide, drip, and produce a completely unworkable mess. The cake must be completely cool — or ideally cold from the refrigerator — before any frosting is applied. There is no shortcut here.
Pressing sprinkles onto the exterior too aggressively: Heavy-handed sprinkle application leaves finger dents and drag marks in the buttercream surface beneath. Use a gentle pressing motion with your palm rather than individual fingers, and work in small sections. The goal is to embed the sprinkles just far enough that they hold — not to push them through the frosting layer.
Storing Tips for the Recipe
At Room Temperature: A fully decorated sprinkle birthday cake can sit at room temperature for up to 6 hours in a cool environment. American buttercream is quite stable at room temperature and holds its structure well in temperatures below 72°F.
Refrigerating: Cover the cake loosely with a cake dome or large inverted bowl and refrigerate for up to 4 days. The cake layers actually improve in moisture and flavor after a day in the refrigerator. Remove from the refrigerator 45 minutes before serving so the buttercream softens to its ideal eating temperature and texture.
Storing Individual Slices: Wrap individual slices tightly in plastic wrap and refrigerate for up to 5 days. This is the ideal format for the birthday person to have personal access to leftover cake throughout the week following the celebration — a gift that keeps giving.
Freezing Cake Layers: Baked and completely cooled unfrosted cake layers freeze beautifully for up to 3 months. Wrap each layer individually in two tight layers of plastic wrap, then in foil, and place in a freezer bag. Thaw overnight in the refrigerator still wrapped — they emerge perfectly moist and ready to assemble.
Freezing Decorated Slices: Freeze individual frosted slices on a parchment-lined baking sheet until solid — about 2 hours — then wrap each one individually in plastic wrap and store in a freezer bag for up to 2 months. Thaw in the refrigerator overnight or at room temperature for 1 hour. The sprinkle exterior may bleed slightly upon thawing but the flavor and texture remain excellent.
Storing Leftover Buttercream: American buttercream stores in an airtight container in the refrigerator for up to 2 weeks or in the freezer for up to 3 months. Bring to room temperature and re-beat with the paddle attachment for 2–3 minutes before using — it returns to its original fluffy consistency perfectly.
Conclusion
The sprinkle birthday cake is not just the most requested birthday cake in America — it is one of the most genuinely joyful things you can bake in a home kitchen. Every element of it, from the confetti-flecked crumb to the cloud of fluffy vanilla buttercream to the cascade of rainbow jimmies on the exterior, is designed to produce a specific emotional response: pure, uncomplicated happiness.
Making it correctly — with properly creamed butter, the right sprinkles in the batter, simple syrup on every layer, a thorough crumb coat, and a fluffy buttercream that has been beaten to genuine lightness — produces a cake that earns the kind of silence at the table that only truly great food creates. The silence before the compliments.
Bake this cake for someone’s birthday this year. Make it with the full sprinkle exterior. Put in the candles. Carry it to the table in the dark. Watch what happens to the face of the person it is for. That is what this cake is for — and it delivers every single time.
Share your sprinkle birthday cake photos in the comments below and tell us whose birthday you celebrated. Did you customize the sprinkle colors to match a party theme? Did you add a drip? Did you try the almond extract and discover what you have been missing? We want to hear all about it. And if you loved this baking project, explore our [Pink Drip Cake], [Chocolate Fudge Layer Cake with Ganache Frosting], and [Rainbow Layer Cake with White Chocolate Buttercream] for more celebration cakes that deliver unforgettable results at every occasion.
FAQs
Q: What is the difference between funfetti cake and a sprinkle birthday cake? They are essentially the same concept with different names. “Funfetti” is actually a trademarked term originally belonging to Pillsbury, coined in 1989 for their boxed cake mix featuring rainbow sprinkles baked directly into a white cake. A homemade “sprinkle birthday cake” or “confetti cake” is the from-scratch equivalent — the same rainbow jimmies baked into a vanilla cake batter — and is universally superior in flavor, texture, and moisture to the boxed version, though the boxed version holds enormous nostalgic appeal for many people.
Q: Why do my sprinkles bleed and turn my batter grey? This is almost always a sprinkle type issue. Nonpareils — the tiny round balls — bleed aggressively upon contact with wet batter because their outer coating dissolves quickly in liquid. Jimmy-style sprinkles have a wax coating that holds their color significantly better during mixing and baking. Always use rainbow jimmies for anything going into batter. Nonpareils are beautiful as exterior garnishes only, where they are not in prolonged contact with moisture.
Q: Can I make this cake in a 9×13-inch sheet pan instead of round layers? Absolutely — and a sheet cake is one of the most practical formats for large gatherings. Pour all the batter into a greased and parchment-lined 9×13-inch pan and bake at 350°F for 35–40 minutes until a toothpick comes out clean. Frost directly in the pan with the full buttercream recipe, cover the top generously with rainbow jimmies, and serve from the pan. No leveling, no assembling, no cake turntable required.
Q: My buttercream tastes too sweet. How do I fix it? American buttercream is inherently sweeter than Swiss or Italian meringue buttercream because it relies on powdered sugar for its structure. To balance the sweetness, increase the salt to ½ teaspoon — salt suppresses perceived sweetness dramatically. Add a teaspoon of lemon juice or apple cider vinegar, which adds acidity that cuts through sugar. Or use a combination of cream cheese and butter as the fat base — cream cheese contributes tanginess that balances the powdered sugar naturally.
Q: How do I get the sprinkles to stick evenly to the outside of the cake? Timing and temperature are everything. Apply the exterior sprinkles immediately after the final frosting layer is applied, before the buttercream has any chance to crust over or firm up. Work over a rimmed baking sheet and use a gentle cupped-palm pressing motion rather than individual fingers. If the buttercream has already firmed up in the refrigerator, let the cake sit at room temperature for 10–15 minutes until the surface is just slightly tacky before attempting to apply the sprinkles.
Q: Can I add food coloring to the cake batter for a more colorful interior? Yes — and it makes for a spectacular surprise when slices are cut. Divide the finished batter into three or four equal portions and tint each a different color using gel food coloring. Alternate scoops of each color into the prepared pans and swirl gently with a toothpick for a marbled effect, or layer them deliberately for a striped cross-section. Use gel coloring only — liquid food coloring adds too much liquid to the batter and dilutes the flavor.
Q: What is the best way to cut a three-layer cake cleanly? Use a long, thin knife dipped in hot water and wiped dry between every single cut. The warm blade glides through the buttercream and cake layers without dragging or tearing. Refrigerating the fully assembled cake for at least 1 hour before slicing firms everything up and produces significantly cleaner cuts with less crumbling at the edges. Slice in a single smooth downward motion rather than a sawing motion for the neatest result.
More Dessert Recipes to Try

Sprinkle Birthday Cake
Ingredients
Equipment
Method
- Preheat the oven to 350°F (175°C).
- Grease two 9-inch round cake pans and line the bottoms with parchment paper.
- In a bowl, whisk together the flour, baking powder, and salt.
- In a large bowl, beat the softened butter and sugar until light and fluffy.
- Add the eggs one at a time, mixing well after each addition.
- Mix in the vanilla extract.
- Gradually add the dry ingredients, alternating with the milk, and mix until just combined.
- Gently fold in the rainbow sprinkles.
- Divide the batter evenly between the prepared cake pans.
- Bake for 25 to 30 minutes, or until a toothpick inserted into the center comes out clean.
- Let the cakes cool in the pans for 10 minutes, then transfer them to a wire rack.
- Allow the cake layers to cool completely.
- To make the frosting, beat the softened butter until creamy.
- Gradually add the powdered sugar, vanilla extract, salt, and heavy cream.
- Beat until smooth and fluffy.
- Place one cake layer on a serving plate and spread frosting over the top.
- Place the second cake layer on top.
- Cover the top and sides of the cake with the remaining frosting.
- Smooth the frosting with an offset spatula.
- Decorate the top and sides with rainbow sprinkles.
- Refrigerate for 20 to 30 minutes before slicing.
Notes
Avoid overmixing after adding the flour to keep the cake soft.
Let the cake layers cool completely before frosting.
Add the sprinkles while the frosting is still slightly soft so they stick easily.
Store the finished cake covered in the refrigerator for up to 4 days.
Let the cake sit at room temperature for 15 to 20 minutes before serving.
Enjoying AmandBox? Follow us on Pinterest for more recipes.